

Introduction to the Classic Strawberry Cheesecake
Explore Delicious Recipes on Food Network
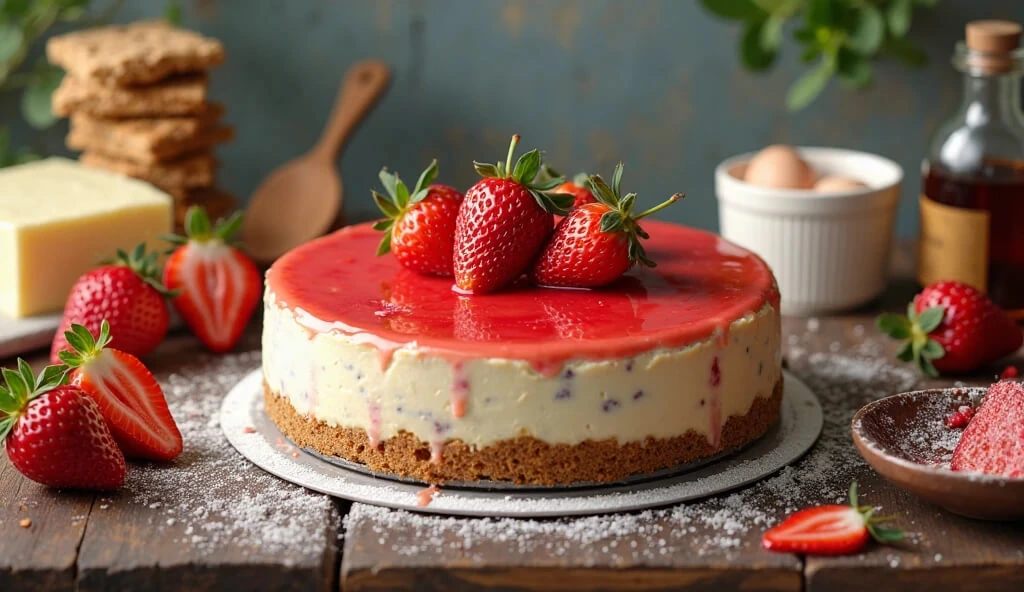
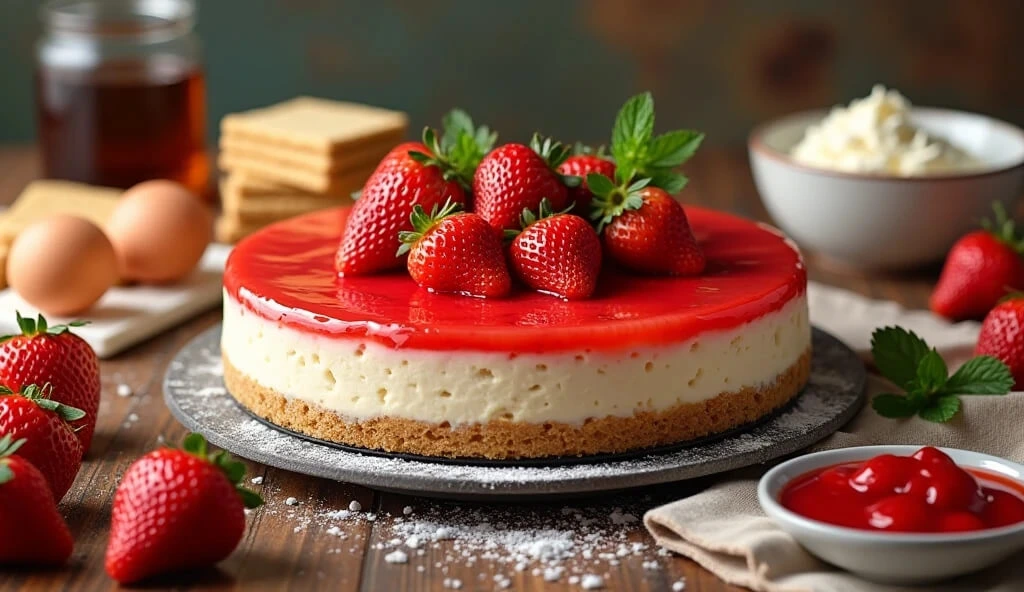
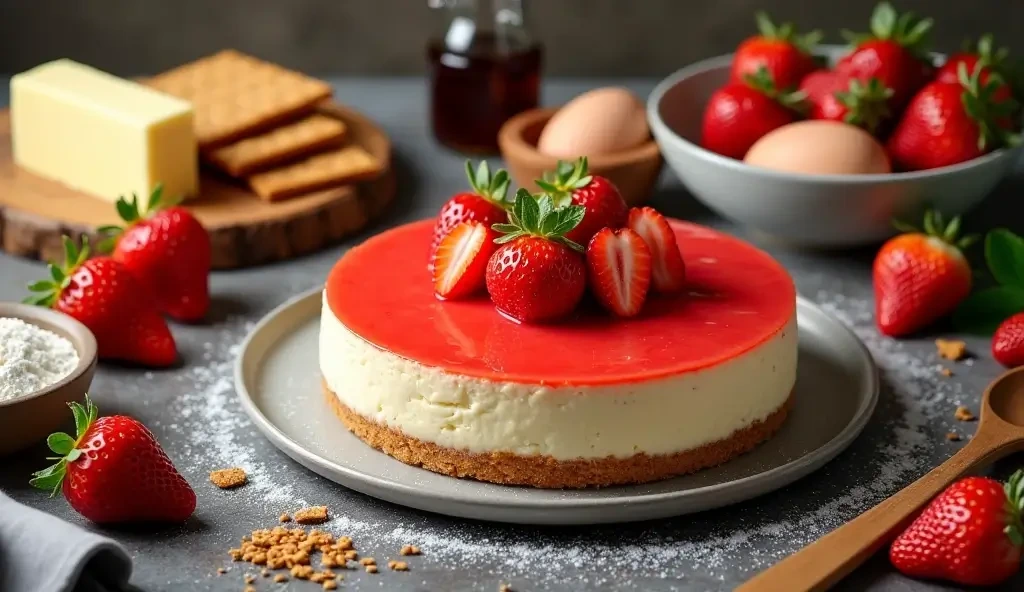
There’s something undeniably magical about a classic strawberry cheesecake—its creamy, velvety filling, buttery graham cracker crust, and the sweet-tart burst of fresh strawberry topping make it a dessert that’s impossible to resist. Whether you’re celebrating a special occasion or simply craving a decadent treat, this strawberry cheesecake recipe is here to deliver perfection in every bite.
What makes this recipe stand out? It’s the perfect balance of rich and refreshing flavors. The smooth, luscious cheesecake filling is made with high-quality cream cheese, while the vibrant strawberry topping adds a pop of color and natural sweetness. Plus, this recipe is designed to be approachable for bakers of all skill levels, so you can confidently create a show-stopping dessert that will impress your family and friends.
From the first crack of the graham cracker crust to the final drizzle of strawberry glaze, this strawberry cheesecake is a labor of love that’s worth every moment. So, grab your apron, preheat your oven, and let’s dive into the art of making the ultimate classic strawberry cheesecake. Trust me, once you taste it, you’ll understand why this dessert has stood the test of time.
Why Strawberry Cheesecake is a Timeless Dessert
Strawberry cheesecake is more than just a dessert—it’s a culinary masterpiece that has captured hearts and taste buds for generations. But what makes it such a timeless classic? Let’s break it down:
1. The Perfect Balance of Flavors
Strawberry cheesecake strikes an irresistible balance between rich, creamy, and refreshing. The velvety cheesecake filling, made with cream cheese, sugar, and a hint of vanilla, provides a luxurious, melt-in-your-mouth experience. Paired with the bright, tangy sweetness of fresh strawberries, it creates a harmony of flavors that’s both indulgent and satisfying. This contrast is what makes every bite so memorable and keeps people coming back for more.
2. Versatility for Any Occasion
Whether it’s a birthday, anniversary, holiday gathering, or just a cozy night in, strawberry cheesecake fits the bill. Its elegant appearance makes it a show-stopping centerpiece for celebrations, while its comforting flavors make it a delightful treat for everyday enjoyment. It’s a dessert that transcends seasons—perfect for summer picnics with its fresh berry topping or as a comforting indulgence during colder months.
3. A Dessert That Feels Special Yet Approachable
There’s something undeniably special about cheesecake. It feels luxurious and sophisticated, yet it’s surprisingly simple to make. With a few basic ingredients and some patience, anyone can create a stunning strawberry cheesecake that looks and tastes like it came from a professional bakery. This combination of elegance and accessibility is what makes it a favorite among home bakers and dessert lovers alike.
4. Nostalgia and Tradition
For many, strawberry cheesecake is more than just a dessert—it’s a nostalgic treat that brings back cherished memories. Maybe it’s the cheesecake your grandma used to make for family gatherings, or the one you enjoyed at your favorite restaurant as a child. Its timeless appeal lies in its ability to evoke feelings of warmth, joy, and connection, making it a dessert that’s deeply rooted in tradition.
5. Endless Customization Options
While the classic strawberry cheesecake is a masterpiece on its own, it’s also incredibly versatile. You can experiment with different crusts (like Oreo or almond), add a layer of chocolate, or even turn it into a no-bake version for a quicker treat. The strawberry topping itself can be adjusted to suit your taste—whether you prefer a chunky compote, a smooth glaze, or simply fresh strawberry slices. This adaptability ensures that strawberry cheesecake never gets boring and can always feel new and exciting.
In a world of ever-changing food trends, strawberry cheesecake remains a constant favorite. Its perfect blend of flavors, versatility, and nostalgic charm make it a dessert that will never go out of style. So, whether you’re a seasoned baker or a first-time cheesecake maker, this strawberry cheesecake recipe is your ticket to creating a dessert that’s as timeless as it is delicious.
What Makes This Recipe Special
When it comes to desserts, not all recipes are created equal. This strawberry cheesecake recipe stands out from the rest for several reasons, making it a must-try for anyone who loves baking or simply enjoys a delicious treat. Here’s what makes this recipe truly special:
1. The Creamiest, Dreamiest Cheesecake Filling
The heart of any great cheesecake is its filling, and this recipe delivers perfection. Made with high-quality cream cheese, a touch of sour cream for tanginess, and just the right amount of sugar, the filling is luxuriously smooth and velvety. The addition of eggs ensures a rich, custard-like texture that melts in your mouth. What sets this recipe apart is the careful balance of ingredients, ensuring the cheesecake is creamy without being overly dense or heavy. It’s the kind of filling that makes you close your eyes and savor every bite.
2. A Buttery, Crunchy Graham Cracker Crust
A great cheesecake starts with a great crust, and this recipe nails it. The graham cracker crust is buttery, slightly sweet, and perfectly crunchy, providing a delightful contrast to the creamy filling. The secret lies in using just the right ratio of graham crackers to melted butter, ensuring the crust holds together without becoming soggy. It’s simple yet incredibly satisfying, adding depth and texture to every slice.
3. Fresh Strawberry Topping That Shines
While many strawberry cheesecake recipes rely on artificial toppings or overly sweet glazes, this one celebrates the natural flavor of fresh strawberries. The topping is made with ripe, juicy strawberries cooked down with a touch of sugar and lemon juice to create a glossy, vibrant sauce. The result is a topping that’s sweet, tangy, and bursting with fresh berry flavor. It’s the perfect complement to the rich cheesecake, adding a pop of color and a refreshing finish.
4. Easy-to-Follow Instructions for Perfect Results
What truly makes this recipe special is how approachable it is. Whether you’re a seasoned baker or a beginner, the step-by-step instructions guide you through the process with ease. From preparing the crust to baking the cheesecake to perfection, every detail is covered. Tips like using room temperature ingredients, avoiding overmixing, and cooling the cheesecake slowly ensure that even first-time bakers can achieve professional-quality results. No cracks, no sinking—just a flawless cheesecake every time.
5. A Dessert That Feels Homemade and Heartfelt
In a world of store-bought desserts and pre-packaged treats, this strawberry cheesecake recipe brings back the joy of homemade baking. There’s something incredibly satisfying about creating a dessert from scratch, especially one as beloved as cheesecake. The process of baking, the aroma that fills your kitchen, and the pride of presenting a beautifully decorated cheesecake to your loved ones—it’s an experience that store-bought desserts simply can’t replicate. This recipe is more than just a dessert; it’s a labor of love that shows you care.
6. Customizable to Suit Your Preferences
While this recipe is perfect as is, it’s also incredibly versatile. If you’re feeling adventurous, you can swap the graham cracker crust for an Oreo or almond crust. You can add a layer of chocolate ganache or drizzle caramel over the top. For a lighter version, you can use low-fat cream cheese or a sugar substitute. The strawberry topping can be adjusted to your liking—chunky or smooth, sweet or tangy. This adaptability ensures that the recipe can be tailored to suit your taste and dietary preferences, making it a go-to for any occasion.
In a nutshell, this strawberry cheesecake recipe is special because it combines simplicity, quality, and a touch of elegance. It’s a dessert that’s as fun to make as it is to eat, and it’s guaranteed to leave a lasting impression on anyone who tries it. Whether you’re baking for a special occasion or just treating yourself, this recipe is sure to become a favorite in your kitchen.
A Brief History of Cheesecake
Cheesecake is a dessert that has stood the test of time, with a rich history that spans thousands of years and countless cultures. Its journey from ancient times to modern-day kitchens is as fascinating as the dessert itself. Let’s take a closer look at the origins and evolution of this beloved treat.
1. Ancient Beginnings
The story of cheesecake begins in ancient Greece, where it was believed to have been served to athletes during the first Olympic Games in 776 BCE. The earliest version of cheesecake was simple—made with just cheese, wheat, and honey. It was considered a source of energy and was even used as a wedding cake. The Greek writer Athenaeus documented the oldest known cheesecake recipe in 230 CE, which included pounding cheese until smooth, mixing it with honey and flour, and baking it into a cake.
2. Roman Adaptation
When the Romans conquered Greece, they adopted the cheesecake recipe and made it their own. The Romans added their own twist by crushing cheese and eggs and baking the mixture under hot bricks. They also introduced cheesecake to the rest of Europe as they expanded their empire. The Roman version, called “libuma,” was often served during special occasions and religious ceremonies. The Roman politician Marcus Porcius Cato even included a recipe for cheesecake in his book De Agri Cultura, one of the oldest surviving works of Latin prose.
3. Medieval Europe and Beyond
As cheesecake spread across Europe, each region began to adapt it to local tastes and ingredients. In England, cheesecake became a popular dessert during the Middle Ages, often flavored with spices like nutmeg and cinnamon. In Germany, bakers experimented with adding cottage cheese and creating lighter, fluffier versions. By the Renaissance, cheesecake had become a staple in European cuisine, with recipes appearing in cookbooks across the continent.
4. Cheesecake Comes to America
Cheesecake made its way to America with European immigrants in the 18th and 19th centuries. However, it wasn’t until the 1920s that the modern cheesecake we know today began to take shape. The invention of cream cheese by American dairyman William Lawrence in 1872 revolutionized the dessert. Cream cheese provided a smoother, richer texture that became the foundation of New York-style cheesecake. In the 20th century, iconic establishments like Junior’s Cheesecake in Brooklyn helped popularize the dessert, making it a symbol of indulgence and luxury.
5. Global Variations and Innovations
Today, cheesecake is enjoyed worldwide, with each culture adding its own unique spin. In Japan, cheesecake is light and fluffy, often made with whipped egg whites for a soufflé-like texture. In Italy, ricotta cheese is used instead of cream cheese, resulting in a slightly grainier but equally delicious dessert. In South Africa, cheesecake is often made with Amarula, a creamy liqueur, for a boozy twist. The versatility of cheesecake has allowed it to evolve and adapt, making it a global favorite.
6. The Rise of Strawberry Cheesecake
Strawberry cheesecake, in particular, gained popularity in the mid-20th century as fresh strawberries became more widely available. The combination of creamy cheesecake and sweet, tangy strawberries was an instant hit. Today, it’s one of the most beloved variations of cheesecake, often served at celebrations and enjoyed as a classic dessert year-round.
7. Cheesecake in Modern Culture
Cheesecake has become more than just a dessert—it’s a cultural icon. It’s featured in movies, TV shows, and literature, often symbolizing indulgence, celebration, or comfort. From the famous “Cheesecake Factory” chain to countless home bakers sharing their creations online, cheesecake continues to inspire and delight people around the world.
In conclusion, the history of cheesecake is a testament to its enduring appeal. From its humble beginnings in ancient Greece to its modern-day variations, cheesecake has evolved into a dessert that transcends time and borders. And when you bake a strawberry cheesecake using this recipe, you’re not just making a dessert—you’re continuing a tradition that has been cherished for thousands of years.
Ingredients for the Perfect Strawberry Cheesecake
For the Graham Cracker Crust
The graham cracker crust is the foundation of any great cheesecake, and this strawberry cheesecake recipe is no exception. A well-made crust provides the perfect contrast to the creamy filling—crunchy, buttery, and slightly sweet. Here’s everything you need to know about creating the perfect graham cracker crust for your cheesecake:
1. The Ingredients: Simple Yet Essential
The graham cracker crust requires just three basic ingredients, but each plays a crucial role in achieving the right texture and flavor:
- Graham Crackers: These slightly sweet, honey-flavored crackers are the star of the crust. You’ll need about 1.5 to 2 cups of finely crushed graham crackers (about 10-12 full sheets). For a gluten-free version, you can use gluten-free graham crackers.
- Butter: Unsalted butter is best, as it allows you to control the saltiness of the crust. Melted butter acts as the binding agent, holding the crumbs together and giving the crust its rich, buttery flavor. You’ll need about 1/2 cup (1 stick) of melted butter.
- Sugar: A small amount of granulated sugar (about 2-3 tablespoons) enhances the sweetness of the crust and helps it hold together. For a deeper flavor, you can use brown sugar instead.
2. How to Crush Graham Crackers
The texture of your crust depends on how finely you crush the graham crackers. Here are a few methods:
- Food Processor: The easiest and most efficient way. Pulse the graham crackers until they turn into fine, even crumbs.
- Ziploc Bag and Rolling Pin: Place the graham crackers in a resealable plastic bag and crush them with a rolling pin until you achieve a fine, sandy texture.
- Mortar and Pestle: For a more hands-on approach, use a mortar and pestle to grind the crackers into crumbs.
Avoid leaving large chunks, as they can make the crust uneven and difficult to slice.
3. Mixing the Crust
Once you have your graham cracker crumbs, it’s time to mix them with the melted butter and sugar:
- In a medium bowl, combine the graham cracker crumbs and sugar.
- Gradually pour in the melted butter while stirring with a fork or spatula. Mix until the crumbs are evenly coated and the mixture resembles wet sand.
- Test the mixture by squeezing a handful—it should hold its shape when pressed together. If it’s too dry, add a bit more melted butter; if it’s too wet, add a few more crumbs.
4. Pressing the Crust into the Pan
A well-pressed crust ensures even baking and a sturdy base for your cheesecake. Here’s how to do it:
- Use a 9-inch springform pan for easy removal of the cheesecake. Lightly grease the bottom and sides of the pan to prevent sticking.
- Pour the crumb mixture into the pan and spread it evenly across the bottom.
- Use the bottom of a measuring cup, a glass, or your fingers to press the crumbs firmly into the pan. Start from the center and work your way out to the edges, ensuring the crust is compact and even.
- For a classic touch, you can press some of the crumbs slightly up the sides of the pan to create a small rim.
5. Pre-Baking the Crust (Optional but Recommended)
Pre-baking the crust helps it set and prevents it from becoming soggy when the filling is added. Here’s how:
- Preheat your oven to 325°F (160°C).
- Place the crust in the oven and bake for 8-10 minutes, or until it’s lightly golden and fragrant.
- Let the crust cool completely before adding the cheesecake filling.
6. Tips for the Perfect Graham Cracker Crust
- Use High-Quality Ingredients: Since the crust has so few ingredients, each one matters. Opt for fresh graham crackers and good-quality butter.
- Don’t Overdo the Butter: Too much butter can make the crust greasy and heavy. Stick to the recommended amount.
- Chill the Crust: If you’re short on time, you can chill the crust in the fridge for 20-30 minutes instead of pre-baking it. This helps it set and hold its shape.
- Experiment with Flavors: Add a pinch of cinnamon, nutmeg, or even cocoa powder to the crumbs for a unique twist.
7. Why This Crust Works So Well
The graham cracker crust in this recipe is more than just a base—it’s a key component that complements the creamy cheesecake filling and fresh strawberry topping. Its slightly sweet, buttery flavor and crunchy texture create a delightful contrast that elevates the entire dessert. Plus, it’s incredibly easy to make, requiring no special skills or equipment.
In summary, the graham cracker crust is the unsung hero of this strawberry cheesecake recipe. It’s simple, versatile, and absolutely delicious, setting the stage for a dessert that’s sure to impress. Take your time to get it right, and you’ll be rewarded with a cheesecake that’s as beautiful as it is tasty.
For the Creamy Cheesecake Filling
The filling is the star of any cheesecake, and this strawberry cheesecake recipe is no exception. A perfect cheesecake filling should be smooth, rich, and velvety, with just the right balance of sweetness and tanginess. Here’s everything you need to know about creating the ultimate creamy cheesecake filling:
1. The Ingredients: Quality Matters
The key to a flawless cheesecake filling lies in using high-quality ingredients. Here’s what you’ll need:
- Cream Cheese: The foundation of the filling. Use full-fat, brick-style cream cheese (like Philadelphia) for the best texture and flavor. Avoid low-fat or whipped varieties, as they can affect the consistency. You’ll need about 24 ounces (3 packages) of cream cheese.
- Sugar: Granulated sugar sweetens the filling and helps create a smooth texture. About 3/4 to 1 cup is ideal, depending on your sweetness preference.
- Eggs: Eggs act as a binding agent and give the cheesecake its structure. Use 3 large eggs at room temperature for the best results.
- Sour Cream: Adds a slight tanginess and helps create a creamy, velvety texture. About 1/2 cup of full-fat sour cream is perfect.
- Vanilla Extract: Enhances the flavor with a warm, aromatic note. Use 1-2 teaspoons of pure vanilla extract for the best taste.
2. Preparing the Ingredients
To ensure a smooth and lump-free filling, proper preparation is key:
- Room Temperature Ingredients: Bring the cream cheese, eggs, and sour cream to room temperature before mixing. Cold ingredients can lead to a lumpy batter and uneven baking.
- Softening the Cream Cheese: If the cream cheese is still slightly cold, cut it into cubes and let it sit at room temperature for 15-20 minutes. This makes it easier to beat until smooth.
3. Mixing the Filling
The way you mix the filling can make or break your cheesecake. Follow these steps for a perfectly smooth batter:
- Beat the Cream Cheese: In a large mixing bowl, beat the cream cheese on medium speed until it’s completely smooth and free of lumps. Scrape down the sides of the bowl as needed.
- Add the Sugar: Gradually add the sugar and continue beating until the mixture is creamy and well combined.
- Incorporate the Eggs: Add the eggs one at a time, beating well after each addition. Be careful not to overmix, as this can incorporate too much air and cause the cheesecake to crack during baking.
- Add Sour Cream and Vanilla: Mix in the sour cream and vanilla extract until just combined. The batter should be smooth, thick, and glossy.
4. Tips for a Perfect Filling
- Avoid Overmixing: Overmixing can introduce too much air into the batter, leading to cracks in the baked cheesecake. Mix just until each ingredient is incorporated.
- Scrape the Bowl: Frequently scrape down the sides and bottom of the mixing bowl to ensure all ingredients are evenly combined.
- Use a Stand Mixer or Hand Mixer: While you can mix by hand, an electric mixer ensures a smoother, more consistent batter.
5. Baking the Filling
Baking the cheesecake properly is crucial for achieving the perfect texture:
- Preheat the Oven: Set your oven to 325°F (160°C). A lower temperature helps prevent cracks and ensures even baking.
- Prepare the Pan: Pour the filling over the pre-baked graham cracker crust in a 9-inch springform pan. Smooth the top with a spatula.
- Water Bath (Optional but Recommended): To prevent cracks and ensure a creamy texture, bake the cheesecake in a water bath. Wrap the bottom of the springform pan in aluminum foil to prevent water from seeping in, then place it in a larger pan filled with hot water.
- Baking Time: Bake for 50-60 minutes, or until the edges are set but the center still has a slight jiggle. The cheesecake will continue to set as it cools.
6. Cooling the Cheesecake
Proper cooling is essential for a creamy, crack-free cheesecake:
- Cool in the Oven: Turn off the oven and crack the door open slightly. Let the cheesecake cool in the oven for about an hour to prevent sudden temperature changes that can cause cracks.
- Cool at Room Temperature: Remove the cheesecake from the oven and let it cool completely at room temperature.
- Chill in the Fridge: Once cooled, refrigerate the cheesecake for at least 4-6 hours, or preferably overnight. This allows the filling to fully set and develop its flavor.
7. Why This Filling Works So Well
This cheesecake filling is a masterpiece of simplicity and precision. The combination of cream cheese, sour cream, and eggs creates a rich, velvety texture that’s both indulgent and satisfying. The addition of vanilla extract adds a subtle warmth that complements the fresh strawberry topping perfectly. Every bite is a harmonious blend of creamy, sweet, and tangy flavors, making it a dessert that’s impossible to resist.
In summary, the creamy cheesecake filling is the heart of this strawberry cheesecake recipe. By following these steps and tips, you’ll create a filling that’s smooth, rich, and utterly delicious. It’s the kind of dessert that will have everyone asking for seconds—and the recipe
For the Fresh Strawberry Topping
The fresh strawberry topping is the crowning glory of this strawberry cheesecake recipe. It adds a burst of vibrant color, natural sweetness, and a refreshing tang that perfectly complements the rich, creamy cheesecake filling. Here’s everything you need to know about creating a strawberry topping that’s as beautiful as it is delicious:
1. The Ingredients: Simple and Fresh
The best strawberry topping is made with just a few high-quality ingredients:
- Fresh Strawberries: Use ripe, juicy strawberries for the best flavor. You’ll need about 2 cups of hulled and sliced strawberries.
- Sugar: Granulated sugar enhances the natural sweetness of the strawberries and helps create a glossy sauce. About 1/4 to 1/2 cup is ideal, depending on the sweetness of your berries.
- Lemon Juice: A splash of fresh lemon juice (about 1-2 tablespoons) adds brightness and balances the sweetness.
- Cornstarch: This acts as a thickening agent, giving the topping a luscious, syrupy consistency. You’ll need about 1-2 teaspoons.
- Water: A small amount of water (about 1/4 cup) helps dissolve the sugar and cornstarch.
2. Preparing the Strawberries
The way you prepare the strawberries can make a big difference in the final result:
- Wash and Hull: Rinse the strawberries under cold water and remove the stems (hull them) using a paring knife or a strawberry huller.
- Slice or Chop: Depending on your preference, you can slice the strawberries into thin pieces, chop them into small chunks, or leave some whole for a chunkier topping.
3. Cooking the Strawberry Topping
Cooking the strawberries transforms them into a glossy, syrupy topping that’s perfect for cheesecake. Here’s how to do it:
- Combine Ingredients: In a medium saucepan, combine the sliced strawberries, sugar, lemon juice, cornstarch, and water. Stir well to coat the strawberries evenly.
- Cook Over Medium Heat: Place the saucepan over medium heat and bring the mixture to a gentle simmer. Stir frequently to prevent sticking.
- Thicken the Sauce: As the mixture heats, the strawberries will release their juices, and the sauce will begin to thicken. This process usually takes about 5-7 minutes.
- Adjust Consistency: If the sauce is too thick, add a splash of water. If it’s too thin, mix a little more cornstarch with water and stir it into the sauce.
- Cool Completely: Remove the saucepan from the heat and let the topping cool to room temperature. As it cools, it will thicken further.
4. Tips for the Perfect Strawberry Topping
- Use Fresh Strawberries: While frozen strawberries can work in a pinch, fresh strawberries provide the best flavor and texture.
- Adjust Sweetness: Taste your strawberries before adding sugar. If they’re very sweet, you may need less sugar; if they’re tart, you may need more.
- Add Flavor Variations: For a unique twist, add a splash of vanilla extract, a pinch of cinnamon, or even a tablespoon of balsamic vinegar to enhance the strawberries’ natural flavor.
- Make It Ahead: The strawberry topping can be made a day in advance and stored in the fridge. This allows the flavors to meld and makes it easier to assemble the cheesecake.
5. Assembling the Cheesecake with the Topping
Once your strawberry topping is ready, it’s time to assemble the cheesecake:
- Spread Evenly: Pour the cooled strawberry topping over the chilled cheesecake, spreading it evenly with a spatula.
- Decorate: For a beautiful presentation, arrange a few fresh strawberry slices or whole strawberries on top. You can also add a drizzle of melted chocolate or a dollop of whipped cream for extra flair.
- Chill Before Serving: Let the cheesecake chill in the fridge for at least 30 minutes to set the topping before slicing and serving.
6. Why This Topping Works So Well
The fresh strawberry topping is more than just a garnish—it’s an essential part of the cheesecake experience. The natural sweetness and slight tartness of the strawberries cut through the richness of the cheesecake filling, creating a perfect balance of flavors. The glossy, syrupy texture adds a luxurious touch, while the vibrant red color makes the dessert visually stunning.
7. Serving Suggestions
- Pair with Whipped Cream: A dollop of freshly whipped cream adds a light, airy contrast to the rich cheesecake and fruity topping.
- Add Fresh Mint: A sprig of fresh mint adds a pop of color and a refreshing note.
- Serve with Coffee or Tea: The sweetness of the cheesecake pairs beautifully with a cup of coffee or tea, making it an ideal dessert for any occasion.
In summary, the fresh strawberry topping is the finishing touch that elevates this strawberry cheesecake recipe from great to extraordinary. It’s simple to make, bursting with flavor, and adds a touch of elegance to every slice. Whether you’re serving it at a special celebration or enjoying it as a treat for yourself, this topping is sure to impress.
Step-by-Step Instructions to Make Strawberry Cheesecake
Preparing the Graham Cracker Crust
The graham cracker crust is the foundation of your strawberry cheesecake, and getting it right is crucial for the overall success of the dessert. A well-made crust should be buttery, slightly sweet, and firm enough to hold the creamy filling without crumbling. Here’s a detailed guide to preparing the perfect graham cracker crust:
1. Gathering Your Ingredients
To make the crust, you’ll need just three simple ingredients:
- Graham Crackers: About 10-12 full sheets (1.5 to 2 cups of crumbs). You can use store-bought or homemade graham crackers. For a gluten-free version, opt for gluten-free graham crackers.
- Butter: Unsalted butter works best, as it allows you to control the saltiness. You’ll need 1/2 cup (1 stick) of melted butter.
- Sugar: Granulated sugar adds a touch of sweetness and helps bind the crust. Use 2-3 tablespoons, depending on your preference.
2. Crushing the Graham Crackers
The texture of your crust depends on how finely you crush the graham crackers. Here are a few methods to achieve the perfect crumbs:
- Food Processor: The quickest and easiest method. Pulse the graham crackers until they turn into fine, even crumbs.
- Ziploc Bag and Rolling Pin: Place the graham crackers in a resealable plastic bag and crush them with a rolling pin. This method gives you more control over the texture.
- Mortar and Pestle: For a hands-on approach, use a mortar and pestle to grind the crackers into crumbs.
Pro Tip: Avoid leaving large chunks, as they can make the crust uneven and difficult to slice. Aim for a sandy, uniform texture.
3. Mixing the Crust
Once you have your graham cracker crumbs, it’s time to mix them with the melted butter and sugar:
- In a medium bowl, combine the graham cracker crumbs and sugar.
- Gradually pour in the melted butter while stirring with a fork or spatula. Mix until the crumbs are evenly coated and the mixture resembles wet sand.
- Test the mixture by squeezing a handful—it should hold its shape when pressed together. If it’s too dry, add a bit more melted butter; if it’s too wet, add a few more crumbs.
4. Pressing the Crust into the Pan
A well-pressed crust ensures even baking and a sturdy base for your cheesecake. Here’s how to do it:
- Choose the Right Pan: Use a 9-inch springform pan for easy removal of the cheesecake. Lightly grease the bottom and sides of the pan to prevent sticking.
- Add the Crumb Mixture: Pour the crumb mixture into the pan and spread it evenly across the bottom.
- Press Firmly: Use the bottom of a measuring cup, a glass, or your fingers to press the crumbs firmly into the pan. Start from the center and work your way out to the edges, ensuring the crust is compact and even.
- Create a Rim (Optional): For a classic touch, press some of the crumbs slightly up the sides of the pan to create a small rim. This helps contain the filling and adds a nice visual element.
5. Pre-Baking the Crust (Optional but Recommended)
Pre-baking the crust helps it set and prevents it from becoming soggy when the filling is added. Here’s how:
- Preheat your oven to 325°F (160°C).
- Place the crust in the oven and bake for 8-10 minutes, or until it’s lightly golden and fragrant.
- Let the crust cool completely before adding the cheesecake filling.
6. Tips for the Perfect Graham Cracker Crust
- Use High-Quality Ingredients: Since the crust has so few ingredients, each one matters. Opt for fresh graham crackers and good-quality butter.
- Don’t Overdo the Butter: Too much butter can make the crust greasy and heavy. Stick to the recommended amount.
- Chill the Crust: If you’re short on time, you can chill the crust in the fridge for 20-30 minutes instead of pre-baking it. This helps it set and hold its shape.
- Experiment with Flavors: Add a pinch of cinnamon, nutmeg, or even cocoa powder to the crumbs for a unique twist.
7. Why This Crust Works So Well
The graham cracker crust in this recipe is more than just a base—it’s a key component that complements the creamy cheesecake filling and fresh strawberry topping. Its slightly sweet, buttery flavor and crunchy texture create a delightful contrast that elevates the entire dessert. Plus, it’s incredibly easy to make, requiring no special skills or equipment.
In summary, preparing the graham cracker crust is a simple yet essential step in creating the perfect strawberry cheesecake. By following these steps and tips, you’ll create a crust that’s sturdy, flavorful, and absolutely delicious. It’s the kind of crust that will have everyone asking for seconds—and the recipe.
Making the Creamy Cheesecake Filling
The creamy cheesecake filling is the heart of your strawberry cheesecake, and getting it just right is essential for a dessert that’s rich, smooth, and utterly irresistible. This section will guide you through every step of creating the perfect filling, from selecting the right ingredients to mastering the mixing and baking process.
1. The Ingredients: Quality is Key
The filling’s texture and flavor depend on the quality of the ingredients you use. Here’s what you’ll need:
- Cream Cheese: The star of the filling. Use full-fat, brick-style cream cheese (like Philadelphia) for the best results. Avoid low-fat or whipped varieties, as they can affect the texture. You’ll need about 24 ounces (3 packages) of cream cheese.
- Sugar: Granulated sugar sweetens the filling and helps create a smooth texture. About 3/4 to 1 cup is ideal, depending on your sweetness preference.
- Eggs: Eggs act as a binding agent and give the cheesecake its structure. Use 3 large eggs at room temperature for the best results.
- Sour Cream: Adds a slight tanginess and helps create a creamy, velvety texture. About 1/2 cup of full-fat sour cream is perfect.
- Vanilla Extract: Enhances the flavor with a warm, aromatic note. Use 1-2 teaspoons of pure vanilla extract for the best taste.
2. Preparing the Ingredients
Proper preparation ensures a smooth and lump-free filling:
- Room Temperature Ingredients: Bring the cream cheese, eggs, and sour cream to room temperature before mixing. Cold ingredients can lead to a lumpy batter and uneven baking.
- Softening the Cream Cheese: If the cream cheese is still slightly cold, cut it into cubes and let it sit at room temperature for 15-20 minutes. This makes it easier to beat until smooth.
3. Mixing the Filling
The way you mix the filling can make or break your cheesecake. Follow these steps for a perfectly smooth batter:
- Beat the Cream Cheese: In a large mixing bowl, beat the cream cheese on medium speed until it’s completely smooth and free of lumps. Scrape down the sides of the bowl as needed.
- Add the Sugar: Gradually add the sugar and continue beating until the mixture is creamy and well combined.
- Incorporate the Eggs: Add the eggs one at a time, beating well after each addition. Be careful not to overmix, as this can incorporate too much air and cause the cheesecake to crack during baking.
- Add Sour Cream and Vanilla: Mix in the sour cream and vanilla extract until just combined. The batter should be smooth, thick, and glossy.
4. Tips for a Perfect Filling
- Avoid Overmixing: Overmixing can introduce too much air into the batter, leading to cracks in the baked cheesecake. Mix just until each ingredient is incorporated.
- Scrape the Bowl: Frequently scrape down the sides and bottom of the mixing bowl to ensure all ingredients are evenly combined.
- Use a Stand Mixer or Hand Mixer: While you can mix by hand, an electric mixer ensures a smoother, more consistent batter.
5. Baking the Filling
Baking the cheesecake properly is crucial for achieving the perfect texture:
- Preheat the Oven: Set your oven to 325°F (160°C). A lower temperature helps prevent cracks and ensures even baking.
- Prepare the Pan: Pour the filling over the pre-baked graham cracker crust in a 9-inch springform pan. Smooth the top with a spatula.
- Water Bath (Optional but Recommended): To prevent cracks and ensure a creamy texture, bake the cheesecake in a water bath. Wrap the bottom of the springform pan in aluminum foil to prevent water from seeping in, then place it in a larger pan filled with hot water.
- Baking Time: Bake for 50-60 minutes, or until the edges are set but the center still has a slight jiggle. The cheesecake will continue to set as it cools.
6. Cooling the Cheesecake
Proper cooling is essential for a creamy, crack-free cheesecake:
- Cool in the Oven: Turn off the oven and crack the door open slightly. Let the cheesecake cool in the oven for about an hour to prevent sudden temperature changes that can cause cracks.
- Cool at Room Temperature: Remove the cheesecake from the oven and let it cool completely at room temperature.
- Chill in the Fridge: Once cooled, refrigerate the cheesecake for at least 4-6 hours, or preferably overnight. This allows the filling to fully set and develop its flavor.
7. Why This Filling Works So Well
This cheesecake filling is a masterpiece of simplicity and precision. The combination of cream cheese, sour cream, and eggs creates a rich, velvety texture that’s both indulgent and satisfying. The addition of vanilla extract adds a subtle warmth that complements the fresh strawberry topping perfectly. Every bite is a harmonious blend of creamy, sweet, and tangy flavors, making it a dessert that’s impossible to resist.
In summary, the creamy cheesecake filling is the heart of this strawberry cheesecake recipe. By following these steps and tips, you’ll create a filling that’s smooth, rich, and utterly delicious. It’s the kind of dessert that will have everyone asking for seconds—and the recipe.
Baking and Cooling the Cheesecake
Baking and cooling are two of the most critical steps in making a perfect strawberry cheesecake. These stages ensure that your cheesecake sets properly, has a smooth, creamy texture, and remains crack-free. Here’s a detailed guide to mastering the baking and cooling process:
1. Preparing for Baking
Before you start baking, make sure everything is ready:
- Preheat the Oven: Set your oven to 325°F (160°C). A lower temperature helps prevent cracks and ensures even baking.
- Prepare the Springform Pan: Ensure your graham cracker crust is firmly pressed into the pan and the filling is poured evenly over it. Smooth the top with a spatula for an even surface.
- Water Bath (Optional but Recommended): A water bath (or bain-marie) is a game-changer for cheesecakes. It creates a humid environment that prevents the cheesecake from drying out or cracking. To set up a water bath:
- Wrap the bottom of the springform pan tightly with aluminum foil to prevent water from seeping in.
- Place the pan in a larger roasting pan or baking dish.
- Fill the larger pan with hot water until it reaches about halfway up the sides of the springform pan.
2. Baking the Cheesecake
Baking is where the magic happens. Follow these steps for a perfectly baked cheesecake:
- Place in the Oven: Carefully transfer the prepared pan (with or without the water bath) to the preheated oven.
- Bake Time: Bake for 50-60 minutes. The exact time may vary depending on your oven, so keep an eye on it.
- Check for Doneness: The cheesecake is done when the edges are set but the center still has a slight jiggle. It should look firm around the edges and slightly wobbly in the middle when you gently shake the pan.
- Avoid Overbaking: Overbaking can cause the cheesecake to crack and become dry. Remember, the cheesecake will continue to set as it cools.
3. Cooling the Cheesecake
Proper cooling is just as important as baking. Rushing this step can lead to cracks or a soggy texture. Here’s how to cool your cheesecake like a pro:
A- Step1 : Cool in the Oven
- Turn Off the Oven: Once the cheesecake is done baking, turn off the oven.
- Crack the Oven Door: Leave the oven door slightly ajar (about 1-2 inches) and let the cheesecake cool inside for about 1 hour. This gradual cooling process helps prevent sudden temperature changes, which can cause cracks.
B-2 : Cool at Room Temperature
- Remove from the Oven: After cooling in the oven, take the cheesecake out and let it sit at room temperature for another 1-2 hours.
- Remove from the Water Bath: If you used a water bath, carefully remove the springform pan from the water and let it sit on a cooling rack.
C-3 : Chill in the Fridge
- Refrigerate: Once the cheesecake has cooled to room temperature, cover it loosely with plastic wrap or aluminum foil and refrigerate for at least 4-6 hours, or preferably overnight. This allows the cheesecake to fully set and develop its flavor.
- Avoid Skipping This Step: Chilling is crucial for achieving the perfect texture—creamy, firm, and sliceable.
4. Tips for Baking and Cooling Success
- Use an Oven Thermometer: Oven temperatures can vary, so an oven thermometer ensures accuracy.
- Avoid Opening the Oven Door: Resist the urge to open the oven door during baking, as this can cause temperature fluctuations and lead to cracks.
- Don’t Rush Cooling: Patience is key. Rushing the cooling process can result in a dense or cracked cheesecake.
- Run a Knife Around the Edge: After baking, run a thin knife around the edge of the cheesecake to loosen it from the pan. This helps prevent cracks as the cheesecake cools and contracts.
5. Why Baking and Cooling Matter
Baking and cooling are the stages that transform your cheesecake from a liquid batter into a firm, creamy dessert. Baking at a low temperature ensures even cooking and prevents overbaking, while proper cooling prevents cracks and helps the cheesecake set to the perfect consistency. Together, these steps ensure a cheesecake that’s smooth, velvety, and visually stunning.
In summary, baking and cooling are the final steps that bring your strawberry cheesecake to life. By following these guidelines, you’ll create a dessert that’s not only delicious but also beautifully presented. It’s the kind of cheesecake that will have everyone asking for seconds—and the recipe.
Tips for the Perfect Strawberry Cheesecake
How to Avoid Cracks in Your Cheesecake
Cracks in a cheesecake can be frustrating, especially after putting in so much effort to create a beautiful dessert. Fortunately, with the right techniques and precautions, you can achieve a smooth, crack-free surface every time. Here’s a detailed guide to preventing cracks in your strawberry cheesecake:
1. Use Room Temperature Ingredients
One of the most common causes of cracks is using cold ingredients, which can lead to an uneven batter and improper baking.
- Cream Cheese, Eggs, and Sour Cream: Bring these ingredients to room temperature before mixing. Cold ingredients don’t blend well, creating lumps and air pockets that can cause cracks during baking.
- How to Soften Cream Cheese: If you’re short on time, cut the cream cheese into cubes and let it sit at room temperature for 15-20 minutes.
2. Avoid Overmixing the Batter
Overmixing incorporates too much air into the batter, which can expand during baking and cause the cheesecake to rise and fall, leading to cracks.
- Mix Gently: Beat the cream cheese and sugar until smooth, but once you add the eggs, mix just until combined. Overbeating the eggs can introduce excess air.
- Scrape the Bowl: Frequently scrape down the sides and bottom of the mixing bowl to ensure even mixing without overworking the batter.
3. Bake at a Low Temperature
High temperatures can cause the cheesecake to bake too quickly, leading to cracks. A low, steady temperature ensures even cooking.
- Ideal Temperature: Bake your cheesecake at 325°F (160°C). This gentle heat allows the cheesecake to set slowly and evenly.
- Avoid Opening the Oven Door: Resist the urge to check on the cheesecake frequently, as temperature fluctuations can cause cracks.
4. Use a Water Bath (Bain-Marie)
A water bath is one of the most effective ways to prevent cracks. It creates a humid environment that helps the cheesecake bake evenly and prevents the surface from drying out.
- How to Set Up a Water Bath:
- Wrap the bottom of the springform pan tightly with aluminum foil to prevent water from seeping in.
- Place the pan in a larger roasting pan or baking dish.
- Fill the larger pan with hot water until it reaches about halfway up the sides of the springform pan.
- Benefits: The steam from the water bath keeps the cheesecake moist and prevents rapid temperature changes that can cause cracks.
5. Don’t Overbake the Cheesecake
Overbaking is a common cause of cracks. The cheesecake will continue to set as it cools, so it’s important to remove it from the oven while the center is still slightly jiggly.
- Check for Doneness: The edges should be set, but the center should have a slight wobble when you gently shake the pan.
- Use a Timer: Bake for 50-60 minutes, but start checking at the 50-minute mark to avoid overbaking.
6. Cool the Cheesecake Gradually
Sudden temperature changes can cause the cheesecake to contract too quickly, leading to cracks. Gradual cooling is key.
- Cool in the Oven: After baking, turn off the oven and crack the door open slightly. Let the cheesecake cool in the oven for about 1 hour.
- Cool at Room Temperature: Remove the cheesecake from the oven and let it cool completely at room temperature for another 1-2 hours.
- Chill in the Fridge: Once cooled, refrigerate the cheesecake for at least 4-6 hours, or preferably overnight, to allow it to set fully.
7. Run a Knife Around the Edge
As the cheesecake cools, it contracts. If it’s stuck to the sides of the pan, it can pull apart and crack.
- Loosen the Edges: After baking, run a thin knife around the edge of the cheesecake to separate it from the pan. This allows the cheesecake to contract freely as it cools.
8. Add a Stabilizer (Optional)
For extra insurance against cracks, you can add a stabilizer to the filling.
- Cornstarch or Flour: Adding 1-2 tablespoons of cornstarch or flour to the batter can help stabilize the filling and reduce the risk of cracking.
- Sour Cream or Heavy Cream: These ingredients add moisture and help create a smoother texture, making the cheesecake less prone to cracking.
9. Embrace Imperfections
Even with all these precautions, small cracks can still happen—and that’s okay! A cracked cheesecake is still delicious, and you can easily cover imperfections with toppings like fresh strawberries, whipped cream, or a glossy strawberry glaze.
10. Why Avoiding Cracks Matters
A smooth, crack-free cheesecake isn’t just about aesthetics—it’s a sign of a well-made dessert. Cracks can indicate overbaking, improper cooling, or uneven mixing, all of which can affect the texture and flavor of your cheesecake. By following these tips, you’ll create a cheesecake that’s as beautiful as it is delicious.
In summary, avoiding cracks in your strawberry cheesecake is all about careful preparation, gentle baking, and gradual cooling. With these techniques, you’ll achieve a flawless cheesecake that’s sure to impress. And remember, even if cracks do appear, they’re just an opportunity to get creative with toppings.
Decorating Your Cheesecake with Fresh Strawberries
Decorating your strawberry cheesecake with fresh strawberries is the perfect way to add a touch of elegance, color, and freshness to your dessert. Not only do strawberries enhance the visual appeal, but they also complement the creamy cheesecake filling with their natural sweetness and slight tartness. Here’s a detailed guide to decorating your cheesecake like a pro:
1. Choosing the Right Strawberries
The key to a stunning decoration starts with selecting the best strawberries:
- Fresh and Ripe: Choose strawberries that are bright red, firm, and fragrant. Avoid berries that are mushy or have green or white patches.
- Uniform Size: If possible, pick strawberries that are similar in size for a more polished look.
- Organic or Pesticide-Free: Since you’ll be using the strawberries as a topping, opt for organic or thoroughly washed berries to ensure they’re safe to eat.
2. Preparing the Strawberries
Before decorating, prepare the strawberries to ensure they look and taste their best:
- Wash and Dry: Rinse the strawberries under cold water and pat them dry with a paper towel. Moisture can make the cheesecake soggy, so ensure they’re completely dry.
- Hull the Strawberries: Remove the stems (hull) using a paring knife or a strawberry huller.
- Slice or Leave Whole: Depending on your design, you can slice the strawberries thinly, cut them into halves, or leave them whole for a bold, rustic look.
3. Classic Decoration Ideas
Here are some timeless ways to decorate your cheesecake with fresh strawberries:
A. Strawberry Fan Slices
- How to Do It: Slice the strawberries thinly, leaving the tip intact. Gently fan out the slices and arrange them in a circular pattern on top of the cheesecake.
- Why It Works: This creates a beautiful, rose-like effect that’s elegant and eye-catching.
B. Whole Strawberries
- How to Do It: Place whole strawberries (with or without stems) evenly across the top of the cheesecake. You can arrange them in a circle, a grid, or a random pattern.
- Why It Works: This is a simple yet striking decoration that highlights the natural beauty of the strawberries.
C. Strawberry Halves
- How to Do It: Cut the strawberries in half lengthwise and arrange them cut-side down in a circular or spiral pattern.
- Why It Works: The vibrant red interior of the strawberries adds a pop of color and looks incredibly appetizing.
D. Strawberry Glaze Topping
- How to Do It: Make a simple strawberry glaze by cooking down sliced strawberries with sugar, lemon juice, and cornstarch. Pour the glaze over the cheesecake and arrange fresh strawberry slices on top.
- Why It Works: The glossy glaze adds shine and enhances the strawberry flavor, while the fresh slices provide texture.
4. Creative Decoration Ideas
If you’re feeling adventurous, try these creative decorating techniques:
A. Strawberry Roses
- How to Do It: Use a paring knife to thinly slice strawberries without cutting all the way through. Gently fan out the slices to create a rose-like shape. Place the “roses” on top of the cheesecake.
- Why It Works: This advanced technique creates a stunning, professional-looking decoration.
B. Strawberry Border
- How to Do It: Arrange sliced strawberries or strawberry halves around the edge of the cheesecake, leaving the center open for other decorations like whipped cream or chocolate drizzle.
- Why It Works: This frames the cheesecake beautifully and adds a touch of sophistication.
C. Mixed Berry Medley
- How to Do It: Combine strawberries with other fresh berries like blueberries, raspberries, or blackberries for a colorful, fruity topping.
- Why It Works: The variety of colors and flavors creates a vibrant and festive look.
5. Adding Finishing Touches
To take your decoration to the next level, consider adding these finishing touches:
- Whipped Cream: Pipe swirls of whipped cream around the edges or in the center of the cheesecake.
- Chocolate Drizzle: Melt some chocolate and drizzle it over the strawberries for a decadent touch.
- Mint Leaves: Add a few fresh mint leaves for a pop of green and a refreshing contrast.
- Edible Flowers: Sprinkle edible flowers like pansies or rose petals for an elegant, gourmet look.
6. Tips for Decorating Success
- Work Quickly: If you’re using a glaze or whipped cream, decorate the cheesecake just before serving to maintain freshness and texture.
- Keep It Balanced: Avoid overcrowding the cheesecake with toppings. Let the strawberries be the star.
- Use a Light Hand: When arranging strawberries, handle them gently to avoid bruising or squishing.
7. Why Decorating Matters
Decorating your cheesecake with fresh strawberries isn’t just about making it look pretty—it’s about creating a memorable experience. A beautifully decorated cheesecake is a feast for the eyes and sets the stage for the delicious flavors to come. Plus, it shows your care and attention to detail, making your dessert even more special.
In summary, decorating your strawberry cheesecake with fresh strawberries is a fun and creative process that elevates your dessert from ordinary to extraordinary. Whether you choose a classic design or something more elaborate, the result will be a stunning centerpiece that’s as delightful to look at as it is to eat.
Storing and Serving Suggestions
Properly storing and serving your strawberry cheesecake ensures that it stays fresh, delicious, and visually appealing. Whether you’re preparing it ahead of time or serving it immediately, these tips will help you make the most of your dessert:
1. Storing Your Cheesecake
To keep your cheesecake fresh and maintain its texture, follow these storage guidelines:
A. Refrigeration
- Why It’s Important: Cheesecake is a dairy-based dessert and must be refrigerated to prevent spoilage.
- How to Store:
- Cover the cheesecake loosely with plastic wrap or aluminum foil to protect it from absorbing odors in the fridge.
- Alternatively, place it in an airtight container if you have one large enough.
- Store in the refrigerator for up to 5 days.
B. Freezing (Long-Term Storage)
- Why It’s Useful: Freezing is ideal if you want to make the cheesecake ahead of time or save leftovers for later.
- How to Freeze:
- Slice the cheesecake into individual portions or freeze it whole.
- Wrap each slice or the entire cheesecake tightly in plastic wrap, then in aluminum foil to prevent freezer burn.
- Place it in a freezer-safe container or bag.
- Freeze for up to 2-3 months.
- How to Thaw:
- Transfer the cheesecake to the refrigerator and let it thaw overnight.
- For quicker thawing, leave it at room temperature for 1-2 hours.
C. Avoiding Moisture and Odors
- Use a Cake Carrier: If you have a cake carrier with a lid, it’s perfect for storing cheesecake in the fridge.
- Keep Away from Strong Odors: Store the cheesecake away from foods with strong smells, like onions or garlic, to prevent flavor transfer.
2. Serving Your Cheesecake
Serving cheesecake is an art in itself. Here’s how to make it a memorable experience:
A. Slicing the Cheesecake
- Use a Sharp Knife: For clean slices, use a sharp, thin-bladed knife.
- Dip the Knife in Hot Water: Before slicing, dip the knife in hot water and wipe it dry. This helps cut through the creamy filling smoothly.
- Cut Slowly: Use a gentle sawing motion to avoid cracking the cheesecake.
B. Plating the Cheesecake
- Use a Cake Server: A flat cake server or spatula makes it easy to lift and transfer slices to plates.
- Add Garnishes: Place a few fresh strawberry slices, a dollop of whipped cream, or a mint leaf on each plate for an elegant touch.
C. Serving Temperature
- Chilled but Not Too Cold: Cheesecake is best served chilled, but let it sit at room temperature for 10-15 minutes before serving to enhance its flavor and texture.
3. Pairing Suggestions
Elevate your cheesecake experience by pairing it with complementary flavors and beverages:
A. Beverages
- Coffee: A cup of freshly brewed coffee or espresso pairs beautifully with the rich, creamy cheesecake.
- Tea: Herbal teas like chamomile or fruity blends complement the strawberry topping.
B. Toppings and Sides
- Whipped Cream: Add a dollop of freshly whipped cream for extra indulgence.
- Chocolate Sauce: Drizzle melted chocolate or chocolate syrup over the cheesecake for a decadent twist.
- Fresh Berries: Serve with additional fresh berries like blueberries or raspberries for a colorful and refreshing contrast.
4. Tips for Serving at Events
If you’re serving the cheesecake at a party or gathering, keep these tips in mind:
- Pre-Slice the Cheesecake: Slice the cheesecake ahead of time and arrange the pieces on a platter for easy serving.
- Keep It Chilled: If the event is outdoors or in a warm room, keep the cheesecake refrigerated until just before serving.
- Label Dietary Options: If you’ve made a gluten-free or vegan version, label it clearly for guests with dietary restrictions.
5. Why Proper Storing and Serving Matters
Storing and serving your cheesecake correctly ensures that it tastes as good as it looks. Proper storage maintains its freshness and texture, while thoughtful serving enhances the overall experience. Whether you’re enjoying it at home or sharing it with others, these tips will help you make the most of your strawberry cheesecake.
In summary, storing and serving your strawberry cheesecake with care ensures that every slice is as delicious and beautiful as the first. By following these suggestions, you’ll create a dessert experience that’s both memorable and delightful.
FAQs About Strawberry Cheesecake
Can I Make This Cheesecake Ahead of Time?
Absolutely! One of the great things about this strawberry cheesecake recipe is that it’s perfect for making ahead of time. In fact, preparing it in advance can enhance its flavor and texture, making it an ideal dessert for parties, holidays, or any occasion where you want to minimize last-minute stress. Here’s everything you need to know about making and storing your cheesecake ahead of time:
1. Why Make Cheesecake Ahead of Time?
- Flavor Development: Cheesecake benefits from resting in the fridge, allowing the flavors to meld and deepen.
- Convenience: Preparing it ahead of time frees up your schedule on the day of your event.
- Stress-Free Serving: You can focus on other tasks knowing your dessert is ready to go.
2. How Far in Advance Can You Make It?
- Up to 2 Days in Advance: You can bake and assemble the cheesecake (including the strawberry topping) up to 2 days before serving. Store it covered in the refrigerator until ready to serve.
- Up to 3 Months in Advance: If you need to prepare it further in advance, you can freeze the cheesecake (without the strawberry topping) for up to 3 months. Add the topping after thawing.
3. Step-by-Step Guide to Making Cheesecake Ahead
A. Baking and Cooling
- Bake the cheesecake as directed in the recipe.
- Let it cool gradually in the oven with the door slightly open, then at room temperature.
- Once cooled, cover it loosely with plastic wrap or aluminum foil and refrigerate.
B. Adding the Strawberry Topping
- If making the cheesecake 1-2 days ahead, you can add the strawberry topping before refrigerating.
- If freezing the cheesecake, wait to add the topping until after thawing.
C. Freezing the Cheesecake
- Cool the cheesecake completely after baking.
- Wrap it tightly in plastic wrap, then in aluminum foil to prevent freezer burn.
- Place it in a freezer-safe container or bag.
- Freeze for up to 3 months.
D. Thawing the Cheesecake
- Transfer the cheesecake from the freezer to the refrigerator and let it thaw overnight.
- Add the strawberry topping just before serving.
4. Tips for Making Cheesecake Ahead
- Store Properly: Always cover the cheesecake to prevent it from absorbing odors in the fridge or freezer.
- Avoid Soggy Crust: If adding the strawberry topping ahead of time, place it on the cheesecake no more than a few hours before serving to prevent the crust from becoming soggy.
- Label and Date: If freezing, label the cheesecake with the date so you know how long it’s been stored.
5. Serving a Make-Ahead Cheesecake
- Bring to Room Temperature: Let the cheesecake sit at room temperature for 10-15 minutes before serving to enhance its flavor and texture.
- Refresh the Topping: If the strawberry topping has been refrigerated, give it a quick stir before adding it to the cheesecake.
- Garnish Before Serving: Add fresh strawberry slices, whipped cream, or mint leaves just before serving for a fresh, vibrant look.
6. Why Make-Ahead Cheesecake is a Game-Changer
Making your strawberry cheesecake ahead of time not only saves you time but also ensures a stress-free dessert experience. The flavors have time to develop, and the texture becomes even creamier. Plus, it’s a great way to plan ahead for special occasions without compromising on quality.
In summary, yes, you can absolutely make this cheesecake ahead of time! Whether you’re preparing it a day in advance or freezing it for later, this recipe is designed to hold up beautifully. By following these tips, you’ll have a delicious, ready-to-serve dessert that’s sure to impress.
Can I Use Frozen Strawberries for the Topping?
Yes, you can use frozen strawberries for the topping in your strawberry cheesecake recipe! While fresh strawberries are ideal for their vibrant flavor and texture, frozen strawberries are a convenient and practical alternative, especially when fresh berries are out of season or unavailable. Here’s everything you need to know about using frozen strawberries for your cheesecake topping:
1. Why Use Frozen Strawberries?
- Convenience: Frozen strawberries are available year-round and are often pre-washed and pre-sliced, saving you time.
- Cost-Effective: They’re usually more affordable than fresh strawberries, especially during off-seasons.
- Consistency: Frozen strawberries are picked and frozen at peak ripeness, so they often have a consistent flavor.
2. How to Use Frozen Strawberries for the Topping
A. Thawing the Strawberries
- Thaw in the Fridge: Transfer the frozen strawberries to the refrigerator and let them thaw overnight. This method preserves their texture and flavor.
- Quick Thaw: If you’re short on time, place the strawberries in a colander and run cool water over them until thawed. Pat them dry with a paper towel to remove excess moisture.
B. Preparing the Topping
- Drain Excess Liquid: Frozen strawberries release more liquid than fresh ones, so drain them well to avoid a watery topping.
- Cook the Topping: Follow the same steps as you would with fresh strawberries:
- Combine the thawed strawberries, sugar, lemon juice, and cornstarch in a saucepan.
- Cook over medium heat until the mixture thickens and the strawberries break down slightly.
- Let the topping cool completely before adding it to the cheesecake.
3. Tips for Using Frozen Strawberries
- Adjust Sugar: Taste the strawberries after thawing. If they’re very sweet, you may need less sugar; if they’re tart, you may need more.
- Add Flavor Enhancers: A splash of vanilla extract, a pinch of cinnamon, or a tablespoon of balsamic vinegar can elevate the flavor of frozen strawberries.
- Use a Thickener: Since frozen strawberries release more liquid, you may need to add an extra teaspoon of cornstarch to achieve the desired consistency.
4. Pros and Cons of Using Frozen Strawberries
Pros:
- Available year-round.
- Often more affordable than fresh strawberries.
- Pre-washed and pre-sliced, saving preparation time.
Cons:
- Slightly softer texture compared to fresh strawberries.
- May require draining excess liquid to avoid a watery topping.
- Less visually appealing than fresh strawberries for garnishing.
5. When to Use Fresh vs. Frozen Strawberries
- Use Fresh Strawberries: When you want the best flavor, texture, and appearance for your topping and garnishes.
- Use Frozen Strawberries: When fresh strawberries are unavailable, out of season, or too expensive. They’re also a great option for cooking the topping, as the texture difference is less noticeable once cooked.
6. Why Frozen Strawberries Are a Great Option
Using frozen strawberries doesn’t mean compromising on flavor or quality. With a few adjustments, you can create a delicious topping that’s just as good as one made with fresh strawberries. Plus, it’s a practical solution for busy bakers or those on a budget.
In summary, yes, you can use frozen strawberries for the topping in your strawberry cheesecake recipe! By following these tips and techniques, you’ll create a flavorful and visually appealing dessert that’s sure to impress. Whether you choose fresh or frozen, the result will be a creamy, dreamy cheesecake topped with the sweet-tart goodness of strawberries.
How Do I Make a Gluten-Free or Vegan Version?
Creating a gluten-free or vegan version of your strawberry cheesecake is easier than you might think! With a few simple substitutions, you can accommodate dietary restrictions without sacrificing flavor or texture. Here’s a detailed guide to making a delicious gluten-free or vegan strawberry cheesecake:
1. Making a Gluten-Free Strawberry Cheesecake
For those avoiding gluten, the main adjustment needed is replacing the graham cracker crust with a gluten-free alternative. The filling can remain the same since cream cheese and other ingredients are naturally gluten-free.
A. Gluten-Free Crust Options
- Gluten-Free Graham Crackers: Use store-bought gluten-free graham crackers or make your own. Crush them and mix with melted butter and sugar as you would with regular graham crackers.
- Almond Flour or Oat Crust:
- Combine 1.5 cups of almond flour or gluten-free oats with 1/4 cup sugar and 1/3 cup melted butter (or coconut oil for a vegan option).
- Press the mixture into the pan and bake at 325°F (160°C) for 10 minutes.
- Cookie Crust: Use gluten-free cookies (like gluten-free vanilla wafers or shortbread cookies) crushed and mixed with butter.
B. Ensure All Ingredients Are Gluten-Free
- Double-check labels on cream cheese, sour cream, and other ingredients to ensure they’re certified gluten-free.
- Use cornstarch or a gluten-free thickener for the strawberry topping.
C. Tips for Success
- Press the crust firmly to prevent it from crumbling.
- Let the crust cool completely before adding the filling to ensure it holds together.
2. Making a Vegan Strawberry Cheesecake
A vegan version requires replacing dairy and eggs with plant-based alternatives. Here’s how to do it:
A. Vegan Crust Options
- Vegan Graham Crackers: Use store-bought vegan graham crackers or make your own. Crush them and mix with melted vegan butter (like Earth Balance) and sugar.
- Nut and Date Crust:
- Blend 1 cup of nuts (like almonds or walnuts) with 1 cup of pitted dates and a pinch of salt.
- Press the mixture into the pan for a no-bake, naturally sweet crust.
B. Vegan Cheesecake Filling
- Vegan Cream Cheese: Use store-bought vegan cream cheese (like Kite Hill or Tofutti) or make your own using cashews.
- Cashew-Based Filling:
- Soak 2 cups of raw cashews in hot water for 4 hours or overnight. Drain and blend with 1/2 cup coconut cream, 1/4 cup maple syrup, 1/4 cup lemon juice, and 1 tsp vanilla extract until smooth.
- Tofu-Based Filling:
- Blend 1 block of silken tofu with 1/2 cup coconut cream, 1/4 cup sugar, 1/4 cup lemon juice, and 1 tsp vanilla extract until creamy.
C. Vegan Strawberry Topping
- Use the same strawberry topping recipe but ensure the sugar is vegan (some refined sugars are processed with bone char).
- For a no-cook option, simply slice fresh strawberries and arrange them on top of the cheesecake.
D. Tips for Success
- Use a high-speed blender for the filling to achieve a smooth, creamy texture.
- Chill the cheesecake for at least 6 hours or overnight to allow it to set properly.
3. Combining Gluten-Free and Vegan
If you need a cheesecake that’s both gluten-free and vegan, simply combine the substitutions above:
- Use a gluten-free and vegan crust (like almond flour or nut-date crust).
- Use a vegan filling (cashew-based or tofu-based).
- Ensure all ingredients, including the strawberry topping, are gluten-free and vegan.
4. Why Make Gluten-Free or Vegan Versions?
- Inclusivity: Everyone can enjoy a slice, regardless of dietary restrictions.
- Health Benefits: Gluten-free and vegan versions can be lighter and easier to digest for some people.
- Flavor Variety: Experimenting with alternative ingredients can lead to delicious new flavors and textures.
5. Serving and Storing
- Serving: Let the cheesecake sit at room temperature for 10-15 minutes before serving to enhance its flavor and texture.
- Storing: Store in the refrigerator for up to 5 days or freeze for up to 3 months.
In summary, making a gluten-free or vegan version of your strawberry cheesecake is entirely possible and equally delicious. With the right substitutions and techniques, you can create a dessert that’s inclusive, flavorful, and satisfying for everyone at the table.
Conclusion
This classic strawberry cheesecake recipe is a must-try for anyone who loves dessert. With its creamy, velvety filling, buttery graham cracker crust, and luscious fresh strawberry topping, it’s a dessert that’s as beautiful as it is delicious. Whether you’re baking for a special occasion or simply treating yourself, this recipe delivers a perfect balance of flavors and textures that will leave everyone craving more.
The best part? It’s versatile and adaptable. Whether you’re making it gluten-free, vegan, or sticking to the classic version, this cheesecake is sure to impress. Plus, with tips for avoiding cracks, decorating like a pro, and storing it ahead of time, you’ll have everything you need to create a show-stopping dessert with ease.
We’d love to see your creations! Share your strawberry cheesecake masterpieces on social media and tag us, or leave a comment below to let us know how it turned out. Your feedback and photos inspire us and our community of bakers!
If you enjoyed this recipe, don’t stop here! Explore more delicious dessert recipes on our blog, from rich chocolate cakes to refreshing fruit tarts. There’s always something new to bake and enjoy.