

Why You’ll Love This Cheesy Garlic Bread Recipe
Visit FoodSafety.gov for Essential Food Safety Information
Quick and Easy to Make
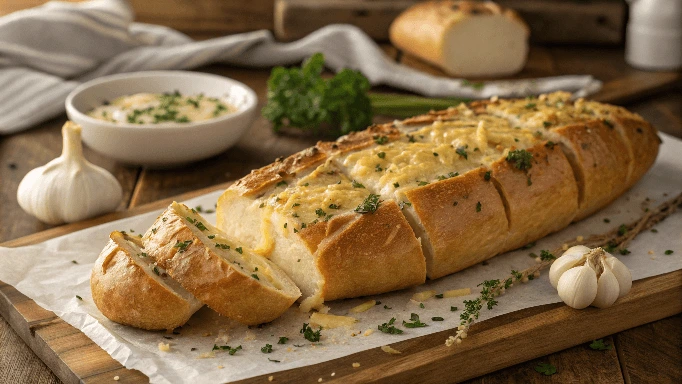
This cheesy garlic bread is not only a crowd-pleaser but also incredibly simple to prepare. Whether you’re looking for a snack, a side dish, or a quick appetizer, this recipe is a perfect go-to. With minimal prep time and just a few ingredients, you can have a golden, cheesy loaf on your table in less than 20 minutes!
- Simple Ingredients: You won’t need to hunt for any fancy or hard-to-find ingredients. All you need is bread, butter, garlic, and cheese. These everyday staples come together effortlessly, making this recipe ideal for those who need a quick solution.
- Minimal Prep Work: The preparation is quick and straightforward. Simply slice the bread, mix the garlic and butter, and spread it generously over the bread slices. Then, sprinkle your cheese of choice on top, and you’re ready to bake. No complicated steps, just simple actions!
- Fast Baking Time: This recipe calls for baking at a high temperature for a short amount of time, ensuring your cheesy garlic bread comes out crispy on the outside and melty on the inside without a long wait. In under 10 minutes, you’ll have a warm, savory treat ready to enjoy.
This recipe is perfect when you’re pressed for time but still want something delicious and comforting. It’s a versatile dish, whether you’re serving it with pasta, soup, or as an appetizer for a gathering.
Crispy, Buttery, and Cheesy Perfection
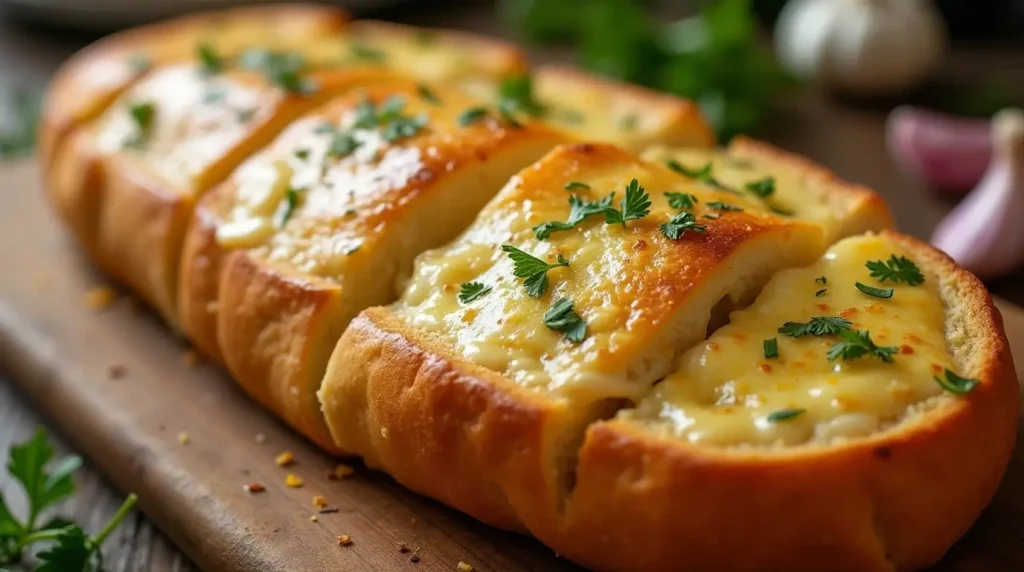
What makes this cheesy garlic bread truly irresistible is the perfect combination of textures and flavors—crispy, buttery, and cheesy all in one bite. Here’s why this recipe achieves the ideal balance:
- Crispy on the Outside: The high heat of the oven creates a golden, crispy crust on the edges of the bread. As the butter melts, it soaks into the bread while crisping up the surface, providing that satisfying crunch that everyone loves. The bread becomes toasted just enough to give it that perfect bite without being too hard or dry.
- Buttery Richness: The garlic butter mixture takes this bread to the next level. The richness of the butter enhances the natural flavor of the bread while giving it a soft, melt-in-your-mouth texture. The garlic infuses the butter, adding that savory kick that makes each bite so flavorful. This buttery coating ensures that every piece is mouthwatering and indulgent.
- Cheesy Goodness: What would cheesy garlic bread be without the cheese? The melted cheese adds a creamy, gooey texture that blends perfectly with the crispy, buttery base. Choose your favorite melting cheese—mozzarella, cheddar, or a blend—to achieve that perfect cheese pull and satisfy your cheesy cravings. The cheese not only adds a rich, melty texture but also creates a golden, bubbling top that completes the visual and taste appeal.
This combination of crispy, buttery, and cheesy elements makes each bite of this garlic bread an explosion of flavor and texture. It’s the kind of side dish or appetizer that will have everyone reaching for more!
Pairs Well with Many Dishes
One of the best things about this cheesy garlic bread is its versatility—it’s the perfect side dish for a wide range of meals, from comforting pastas to hearty soups, or even as a standalone snack. Its rich, savory flavor complements almost any dish you’re serving, making it a reliable crowd-pleaser for every occasion. Here’s how it pairs perfectly with different meals:
- Pasta Dishes: Whether you’re serving a creamy pasta like Alfredo or a classic tomato-based spaghetti, cheesy garlic bread makes an ideal accompaniment. The crispy, buttery bread helps balance the richness of creamy pasta and adds a satisfying crunch next to the softness of the noodles. It’s also perfect for dipping into flavorful pasta sauces, soaking up all the extra goodness.
- Soups and Stews: On a chilly day, a warm bowl of soup or stew is always comforting, and cheesy garlic bread is the perfect side to complete the meal. Think of pairing it with a hearty tomato soup, a rich and creamy chowder, or a chunky vegetable stew. The bread soaks up the soup, while the garlicky, cheesy flavor adds extra depth to each spoonful.
- Salads: For a lighter meal, pair your cheesy garlic bread with a fresh, crisp salad. The crunchiness of the bread complements the freshness of the greens, while the buttery garlic flavor provides a savory contrast to the lightness of the salad. It works especially well with Caesar salads, Greek salads, or any salad that features bold, tangy dressings.
- Grilled Meats: Whether you’re serving grilled chicken, steak, or sausages, cheesy garlic bread adds a savory side that perfectly complements the smoky, charred flavors of the meat. The rich garlic butter and gooey cheese create a wonderful contrast to the savory meat, making each bite a delicious balance of flavors.
- Snack or Appetizer: Don’t forget that cheesy garlic bread is a great standalone snack or appetizer for gatherings. It’s a hit at parties, casual get-togethers, or movie nights. Its delicious flavor and satisfying crunch will have everyone coming back for more, making it the perfect finger food to share with friends and family.
No matter the occasion or the main dish, cheesy garlic bread’s simple yet indulgent flavor profile makes it a go-to option that pairs beautifully with nearly everything!
Ingredients You’ll Need
Bread Selection for the Best Texture
Choosing the right bread is crucial to achieving the perfect texture in your cheesy garlic bread. The bread’s structure and density will influence how it holds up to the garlic butter and cheese, as well as the final crunchiness and softness of each bite. Here are some tips on selecting the best bread for that ideal balance of crispy, chewy, and flavorful:
- Baguette: A classic choice for garlic bread, the baguette is long, thin, and crusty. Its firm crust gives it that irresistible crunch when toasted, while the soft, airy interior soaks up the garlic butter beautifully. A baguette’s shape also allows for perfect individual slices that hold up well under the weight of the cheese, creating a nice contrast between crispy edges and a tender center.
- Ciabatta: Known for its open, airy crumb and slightly chewy texture, ciabatta bread is another excellent option for garlic bread. Its rustic, slightly tangy flavor pairs well with the rich butter and savory garlic, and its chewy interior gives each bite a satisfying, hearty feel. The slightly crunchy exterior of ciabatta ensures a wonderful balance when toasted, giving you the perfect crispy outside and soft inside.
- Sourdough: If you’re looking to add a little extra tang to your cheesy garlic bread, sourdough is a fantastic choice. The tangy flavor of the sourdough complements the savory garlic and butter, adding depth to the bread’s taste. Sourdough’s thick, chewy texture holds up well under the garlic butter and cheese, while the crispy crust gives it an extra crunch that contrasts nicely with the gooey cheese.
- Italian Bread: For a soft, pillowy texture with a slight chew, Italian bread works wonders for cheesy garlic bread. Its dense, soft interior absorbs the garlic butter without becoming soggy, and it has just the right amount of airiness for a satisfying bite. When toasted, the bread turns golden brown and crispy on the outside while remaining light and fluffy inside, creating the perfect texture contrast.
- French Bread: Similar to baguette but often a bit wider, French bread provides a slightly thicker, sturdier base that can hold up to a generous spread of garlic butter and melted cheese. Its firm, crusty exterior gives a satisfying crunch, and its soft, slightly chewy interior ensures a perfect bite that’s both crispy and tender.
- Bread Loaf: For those who prefer a more substantial option, a simple loaf of white or whole wheat bread can also work well for cheesy garlic bread. Though not as crusty as a baguette or ciabatta, a loaf can still provide a great balance of soft and crispy textures when toasted. Slice it thick or thin to suit your preference, and the butter and cheese will still melt perfectly into every bite.
The Right Thickness for the Perfect Crunch
The thickness of your bread slices is another key factor in achieving the right texture. Thin slices will get extra crispy, creating a crunchier bite, while thicker slices will maintain a tender interior. Experiment with the thickness to find your perfect balance between a crisp exterior and a soft, melt-in-your-mouth center.
In the end, the best bread for cheesy garlic bread is one that has a good balance of crust and softness, providing that perfect combination of crunch and chewiness with every bite. Play around with different types of bread to find your favorite, and you’ll be sure to create a garlic bread that’s always a hit!
The Perfect Cheese Blend
The cheese is the star of cheesy garlic bread, so selecting the right blend is key to achieving that perfect, gooey, melty, and flavorful result. A good cheese blend will create a balance of creamy texture, sharpness, and meltability, enhancing both the flavor and texture of the bread. Here’s a breakdown of how to choose and combine cheeses for the ultimate cheesy garlic bread:
- Mozzarella: The classic choice for cheesy garlic bread, mozzarella provides that ideal melty texture that makes each bite irresistible. Its mild, creamy flavor allows the garlic and butter to shine while still giving you that stretchy, gooey cheese pull. Fresh mozzarella can be used for an even more indulgent, soft texture, while shredded mozzarella provides a more even melt and crispiness when baked.
- Cheddar: Adding sharp cheddar cheese to your garlic bread brings an extra layer of richness and depth. Its sharp, tangy flavor complements the buttery garlic mixture, creating a more complex taste that stands up well to stronger flavors. A blend of sharp and mild cheddar will give you both the richness and the smooth melt you want without overwhelming the dish. It also adds a nice golden hue to the top of your garlic bread as it melts and crisps.
- Parmesan: A sprinkle of grated parmesan cheese adds a nutty, salty flavor that enhances the overall taste of your cheesy garlic bread. Parmesan is typically used as a finishing touch, sprinkled on top before or after baking. It creates a deliciously crispy and savory crust on top of the melted cheese, elevating the texture and adding an extra layer of flavor.
- Gruyère: For a more refined, slightly nutty flavor, Gruyère cheese is an excellent addition to your cheese blend. It melts beautifully, creating a smooth and velvety texture that complements the other cheeses. Its rich, buttery flavor pairs well with the garlic and butter, bringing a touch of sophistication to your cheesy garlic bread. Gruyère also adds a delightful depth that enhances the overall experience.
- Fontina: Fontina cheese is another great melting cheese with a rich, creamy texture. It’s slightly tangy, which adds a nice contrast to the buttery garlic and helps balance the richness of the other cheeses. Fontina melts into a luscious, gooey layer that enhances the overall mouthfeel of the bread, making each bite extra indulgent.
- Provolone: For a slightly smokier, more complex flavor, provolone is a wonderful addition to your cheesy garlic bread. This semi-soft cheese has a smooth texture that melts beautifully and a subtle smokiness that adds depth to the overall flavor. Combining provolone with mozzarella creates a perfect balance of meltability and flavor complexity.
Creating the Perfect Blend
When choosing your cheese blend, it’s important to consider both meltability and flavor balance. Combining a high-melt cheese like mozzarella with a sharper cheese like cheddar or Gruyère provides the perfect combination of gooey texture and bold flavor. You can also experiment with different proportions of cheese to suit your personal preferences—more mozzarella for extra stretch or more cheddar for a sharper bite.
For added flavor complexity, consider mixing in small amounts of parmesan or romano for a salty finish or adding a hint of smoked cheese for a unique twist. The key is to find a blend that complements the garlic butter while still allowing the bread’s texture and the cheese’s meltability to shine.
Cheese Toppings and Garnishes
After baking, you can also add a bit of extra cheese on top of your garlic bread for a more indulgent finish. A final sprinkle of parmesan, or even a little shredded mozzarella, can help give your bread that irresistible golden, bubbly top that makes it even more tempting.
By choosing the right cheese blend and experimenting with different combinations, you can elevate your cheesy garlic bread to the next level, making it a truly unforgettable side dish.
Flavor-Boosting Additions
While the garlic butter and cheese are the stars of the show, adding a few extra ingredients can elevate your cheesy garlic bread to a whole new level. These flavor-boosting additions can provide additional depth, texture, and complexity, making each bite even more satisfying and exciting. Here are some great ideas to take your garlic bread to the next level:
- Fresh Herbs: Fresh herbs are an easy way to infuse your garlic bread with vibrant, aromatic flavors. Parsley is the most popular herb to pair with garlic bread, adding a fresh, slightly bitter note that complements the richness of the garlic and cheese. You can also experiment with basil, oregano, thyme, or rosemary for more complex flavors. Simply chop the herbs finely and mix them into your garlic butter before spreading it on the bread, or sprinkle them on top after baking for a burst of fresh flavor.
- Crushed Red Pepper Flakes: If you enjoy a little heat, a pinch of crushed red pepper flakes can add a nice spicy kick to your garlic bread. The heat from the flakes balances the richness of the butter and cheese while adding a subtle warmth that enhances the savory flavors. You can sprinkle the flakes directly on top of the buttered bread before baking or incorporate them into the garlic butter for an evenly distributed spice.
- Parmesan Crust: For an extra touch of savory goodness, you can sprinkle a generous layer of grated parmesan on top of your garlic bread before baking. As the cheese melts, it forms a crispy, golden crust that adds a delightful crunch and an intense umami flavor. The sharp, salty parmesan balances out the richness of the garlic butter, giving each bite a more complex taste and texture.
- Lemon Zest: For a refreshing twist, a bit of lemon zest can brighten up the flavors of your garlic bread. The citrusy aroma and slight acidity contrast beautifully with the rich, buttery, and cheesy elements, adding a lightness that lifts the overall dish. Lemon zest works especially well if you’re using fresh herbs like basil or thyme, as it complements their flavors while adding a touch of brightness.
- Caramelized Onions: Sweet and savory caramelized onions bring a rich, deep flavor to your cheesy garlic bread. The slow cooking process enhances the natural sweetness of the onions, which pairs wonderfully with the garlic butter and cheese. To incorporate caramelized onions, simply sauté them until golden and soft, then spread them on top of the garlic butter before adding the cheese and baking. This adds a savory-sweet depth that makes your garlic bread even more indulgent.
- Bacon or Pancetta: For a smoky, savory crunch, add some crumbled bacon or pancetta to your cheesy garlic bread. The saltiness and crispness of the bacon bits create a wonderful contrast to the creamy cheese and buttery bread, giving each bite a satisfying umami boost. You can either sprinkle the bacon on top before baking or mix it into the garlic butter for more even distribution.
- Roasted Garlic: For those who want to intensify the garlic flavor, roasted garlic is a fantastic addition. Roasting garlic softens its sharpness and brings out a sweet, mellow flavor that’s perfect for garlic bread. Simply roast a bulb of garlic until golden and soft, then squeeze the cloves out of their skins and mix them into your garlic butter. This will create a richer, more complex garlic flavor that enhances the overall dish.
- Sun-Dried Tomatoes: If you’re craving something a little more Mediterranean, sun-dried tomatoes can add a tangy, sweet flavor that pairs perfectly with the richness of the garlic butter and cheese. Chop them finely and mix them into the garlic butter, or sprinkle them on top of the bread before baking. Their intense, slightly chewy texture contrasts nicely with the softness of the bread and adds a burst of flavor in every bite.
- Olives: For a savory, briny addition, chopped black or green olives can introduce a Mediterranean flair to your garlic bread. The saltiness of the olives pairs wonderfully with the rich garlic butter and cheese, adding a depth of flavor and a slight chewiness. You can mix them into the garlic butter or scatter them on top before baking.
- Truffle Oil or Truffle Salt: For a touch of luxury, drizzle a bit of truffle oil over your garlic bread or sprinkle truffle salt on top just before serving. The earthy, aromatic flavor of truffle oil adds a sophisticated and indulgent note to your garlic bread, making it feel like a gourmet treat.
By incorporating these flavor-boosting additions, you can customize your cheesy garlic bread to suit any taste preference. Whether you want to add a little heat, sweetness, or a savory twist, these ingredients will help take your garlic bread from delicious to extraordinary. Experiment with one or more of these additions to create your own perfect version!
Step-by-Step Instructions for Making Cheesy Garlic Bread
Preparing the Garlic Butter Mixture
The garlic butter mixture is the heart of cheesy garlic bread, infusing the bread with rich, savory flavors and ensuring that each bite is indulgent and flavorful. Getting the garlic butter just right is key to creating that perfect balance of creamy, garlicky goodness. Here’s how to prepare the ideal garlic butter mixture for your bread:
- Start with Softened Butter: For the best consistency and ease of spreading, begin with softened butter. Cold butter can be hard to spread, and you’ll miss out on achieving a smooth, even layer across the bread. Let the butter sit at room temperature for about 30 minutes, or soften it quickly by microwaving it for 10-15 seconds (just until it’s soft but not melted). This ensures the butter is easy to mix and spread without tearing the bread.
- Fresh Garlic vs. Garlic Powder: Fresh garlic is always the best option for maximum flavor. To prepare it, peel and finely mince or grate the garlic cloves. Fresh garlic provides a pungent, bold flavor that infuses the butter with aromatic goodness. If you’re in a pinch, garlic powder can be used as an alternative, but it won’t provide the same depth and freshness. If you do opt for garlic powder, use about 1 teaspoon per 1/2 cup of butter, adjusting based on your taste preference.
- Infuse the Garlic: To get the most flavor out of your garlic, consider infusing the minced garlic into the butter before spreading it on the bread. To do this, melt the butter in a small saucepan over low heat, then add the minced garlic and let it cook for a minute or two. This allows the garlic to release its natural oils and flavors into the butter, giving the mixture a deep, rich taste. Be careful not to burn the garlic; you want it soft and aromatic, not bitter. If you prefer a milder garlic flavor, you can skip this step and simply mix the minced garlic directly into the softened butter.
- Add a Pinch of Salt: A small pinch of salt helps to elevate the garlic butter and bring out the flavors of the garlic. The salt also enhances the savory taste of the butter and ensures that each bite of garlic bread has a well-balanced seasoning. If you’re using salted butter, be cautious when adding extra salt, as it may already provide enough seasoning.
- Optional Flavor Enhancers: If you want to take your garlic butter to the next level, consider adding a few optional flavor enhancers:
- Fresh Herbs: Fresh chopped herbs like parsley, basil, thyme, or oregano can add a burst of freshness and additional layers of flavor to your garlic butter. Add them after the garlic is well-mixed into the butter for a fragrant, herb-infused spread.
- Lemon Zest: A touch of lemon zest adds brightness to the garlic butter and balances out the richness of the butter. It also pairs beautifully with fresh herbs and complements the garlic without overpowering it.
- Parmesan Cheese: Mixing in a bit of grated parmesan directly into the garlic butter adds a salty, nutty flavor that enhances the overall taste. This works especially well if you’re going for a cheesy garlic bread with extra cheesy depth.
- Crushed Red Pepper Flakes: For a bit of heat, add a pinch of crushed red pepper flakes to your garlic butter. The spice provides a nice contrast to the rich butter and garlic, adding a subtle kick that elevates the flavor.
- Mix Thoroughly: Once you’ve added all your ingredients, mix the garlic butter thoroughly with a spoon or whisk to ensure that the garlic and seasonings are evenly distributed. If you’ve melted the butter for infusing the garlic, let it cool slightly before mixing in any additional herbs or cheese to avoid wilting the fresh herbs or melting the cheese.
- Taste and Adjust: Before spreading the garlic butter on the bread, take a moment to taste it. If you feel it needs more garlic, salt, or herbs, adjust accordingly. The garlic butter should have a bold, savory flavor that will stand up to the bread without being overwhelming. You want it to complement the bread and cheese while providing that satisfying burst of flavor in each bite.
- Storage Tip: If you’ve made extra garlic butter, store it in an airtight container in the fridge for up to a week. You can also freeze it in small portions for future use. When you’re ready to use it again, simply bring it to room temperature or soften it in the microwave before spreading it on the bread.
By taking the time to prepare the garlic butter mixture thoughtfully, you’ll ensure that every piece of garlic bread is bursting with flavor. Infusing the garlic, using the right seasonings, and adjusting to your taste preferences will elevate the simple ingredients to create a truly delicious and memorable side dish.
Assembling and Baking
Once you’ve prepared your garlic butter mixture and selected your bread and cheese, it’s time to bring everything together to create the perfect cheesy garlic bread. The process of assembling and baking plays a crucial role in ensuring that your garlic bread comes out crispy on the outside, gooey on the inside, and perfectly golden. Here’s how to assemble and bake your cheesy garlic bread to perfection:
- Preheat the Oven: Start by preheating your oven to 375°F (190°C). This temperature is ideal for allowing the butter to melt into the bread without burning, while also ensuring that the cheese melts and turns golden brown. If you want your bread to be extra crispy, you can increase the temperature slightly, but be sure to monitor it carefully to prevent the bread from burning.
- Prepare the Bread: Slice your bread into even, generous slices. The thickness of your slices will determine how crispy or soft the interior of your garlic bread will be. For a crispier result, slice the bread thinner; for a more tender, pillowy texture, opt for thicker slices. Arrange the slices in a single layer on a baking sheet, making sure there’s enough space between them for air to circulate. This helps the bread crisp up evenly.
- Spread the Garlic Butter: Using a knife or spatula, spread a generous amount of your prepared garlic butter mixture on each slice of bread. Be sure to cover the entire surface of the bread, from edge to edge, so each bite is infused with that rich, garlicky flavor. If you want to make your garlic bread extra flavorful, you can spread a thick layer of butter or even use a pastry brush to lightly coat the bread with an even layer of the garlic butter.
- Add the Cheese: Once the garlic butter is spread evenly on the bread, it’s time to layer on the cheese. Sprinkle your chosen cheese blend generously over each slice, ensuring that the cheese is evenly distributed. If you want to take it up a notch, you can pile on extra cheese for an ultra-melty, cheesy result. For a more gourmet touch, you can add a little extra grated parmesan or some crumbled feta on top for an additional layer of flavor.
- Optional Garnishes: Before baking, you can add any optional garnishes or toppings to your garlic bread, such as chopped fresh herbs (like parsley or basil), crushed red pepper flakes for a touch of heat, or a sprinkle of extra parmesan for added flavor and a crispy, golden crust. If you want to add roasted garlic, caramelized onions, or any of the other flavor-boosting ingredients mentioned earlier, now is the time to scatter them over the cheese.
- Bake the Garlic Bread: Place your prepared baking sheet in the preheated oven and bake for about 10-15 minutes, or until the bread is golden brown and the cheese is melted, bubbly, and slightly browned. Keep an eye on it towards the end to avoid overbaking, as the bread can go from golden to burnt quickly. The goal is a crispy, golden exterior with a melty, gooey interior. If you prefer your garlic bread extra crispy, you can place it under the broiler for the last 1-2 minutes of baking, but be sure to watch it closely so it doesn’t burn.
- Serve Immediately: Once your garlic bread is baked to perfection, remove it from the oven and let it cool for a minute or two before serving. This allows the cheese to set slightly, making it easier to cut and handle. For the best experience, serve your cheesy garlic bread immediately while it’s hot and the cheese is still melty. The bread should be golden, crispy on the outside, and soft and tender on the inside.
- Cut and Enjoy: Using a serrated knife, cut your cheesy garlic bread into individual pieces or slices, depending on how thick you cut the bread. If you’ve made a baguette-style garlic bread, simply slice it into individual pieces, while for larger loaves or round bread, you can cut it into wedges or smaller sections. Serve the garlic bread on a platter alongside your favorite main dishes or as an appetizer that’s sure to impress.
By following these steps, you’ll ensure that your cheesy garlic bread is crispy, gooey, and perfectly balanced in flavor and texture. Assembling the bread carefully and keeping an eye on the baking time will help you achieve that ideal golden-brown crust, with melted cheese that stretches with every bite.
Serving Suggestions & Variations
Cheesy garlic bread is a versatile side dish that pairs wonderfully with a wide range of meals, but it can also be customized to suit different tastes and occasions. Whether you’re serving it as a starter, a side dish, or transforming it into a main course, there are plenty of ways to enjoy and enhance your garlic bread. Here are some serving suggestions and variations to inspire you:
1. Pairing with Soups and Salads
Cheesy garlic bread is the perfect accompaniment to warm, hearty soups and crisp, refreshing salads. Its rich, garlicky flavor complements a wide range of soup types, from creamy tomato bisque to savory Italian minestrone. The crispy texture of the bread also provides a delightful contrast to the smooth, comforting texture of soups.
Similarly, cheesy garlic bread can elevate a simple salad, adding richness and texture to a light green salad or a tangy Caesar salad. The garlicky flavor of the bread ties in nicely with the tangy dressing of salads like Greek or arugula with balsamic vinegar.
Serving Idea: Pair cheesy garlic bread with a bowl of classic tomato soup or a creamy potato leek soup for a cozy, comforting meal.
2. As an Appetizer or Finger Food
Cheesy garlic bread makes for an irresistible appetizer that’s easy to share with family and friends. Whether you’re hosting a casual dinner party or just having a movie night, cheesy garlic bread will be a crowd-pleaser. Slice it into bite-sized pieces for easy dipping into marinara sauce, ranch dressing, or garlic butter.
Serving Idea: Serve it as part of a spread of finger foods, alongside bruschetta, caprese skewers, or meatballs. It’s perfect for dipping and makes a great addition to a charcuterie board.
3. Add a Protein for a Hearty Meal
Transform your cheesy garlic bread into a complete meal by adding a protein on top. You can layer it with sliced grilled chicken, seasoned steak, or even sautéed shrimp to create a more substantial, satisfying dish. The richness of the garlic butter and melted cheese pairs well with savory meats, making this a great option for a quick dinner.
Serving Idea: Top your cheesy garlic bread with slices of grilled chicken, marinara sauce, and extra cheese to create a “cheesy chicken parmesan” open-faced sandwich.
4. Make It a Vegetarian Delight
For a vegetarian twist, consider loading your cheesy garlic bread with fresh vegetables or roasted mushrooms. Roasting vegetables like bell peppers, zucchini, and eggplant enhances their natural sweetness, making them the perfect topping for your garlic bread. You can also add sautéed spinach or artichoke hearts for added flavor and texture.
Serving Idea: Top your cheesy garlic bread with roasted vegetables and a drizzle of balsamic glaze for a simple yet satisfying vegetarian option.
5. Create a Cheesy Garlic Bread Pizza
For pizza lovers, turning your cheesy garlic bread into a pizza is an easy and delicious variation. After spreading the garlic butter and cheese, top it with your favorite pizza toppings—such as pepperoni, olives, mushrooms, or bell peppers. Bake it until the cheese is bubbly and golden, then slice and serve.
Serving Idea: Transform your garlic bread into a pizza by adding marinara sauce, mozzarella, and your favorite pizza toppings, such as sausage, pepperoni, and bell peppers.
6. Use Different Types of Bread
While traditional garlic bread is made with French bread or a baguette, there are many other types of bread that can offer unique textures and flavors. Consider using ciabatta, sourdough, or even focaccia for a different take on cheesy garlic bread. The soft, chewy texture of ciabatta or the tanginess of sourdough adds an extra layer of flavor to your dish.
Serving Idea: Use sourdough bread to make a tangy, hearty cheesy garlic bread, or opt for a soft focaccia for a more pillowy, airy texture.
7. Make It Spicy
For those who love a bit of heat, adding spicy elements to your cheesy garlic bread is a great way to kick it up a notch. Incorporating jalapeños, chili flakes, or a drizzle of hot sauce into the garlic butter gives your bread a fiery punch. You can also try spicing up the cheese by mixing in some spicy pepper jack or adding a sprinkle of crushed red pepper on top before baking.
Serving Idea: Serve spicy cheesy garlic bread alongside a cooling dip, like ranch or sour cream, to balance the heat.
8. Truffle-Infused Garlic Bread
For a more indulgent, gourmet variation, drizzle a bit of truffle oil over your cheesy garlic bread before or after baking. The earthy, luxurious flavor of truffle oil complements the rich, garlicky butter and cheese, creating a more sophisticated version of this beloved dish. You can also sprinkle a bit of truffle salt on top for added truffle flavor.
Serving Idea: Serve truffle-infused cheesy garlic bread as a side with grilled meats, roasted vegetables, or even a rich, creamy pasta dish.
9. Make It Gluten-Free
If you’re catering to gluten-sensitive or gluten-free guests, you can easily make gluten-free cheesy garlic bread by swapping the traditional bread for a gluten-free loaf. There are many delicious gluten-free bread options available that will provide the same satisfying crunch and texture as regular bread.
Serving Idea: Serve gluten-free cheesy garlic bread alongside a hearty salad or as an appetizer to start off your meal.
With these serving suggestions and variations, you can customize your cheesy garlic bread to fit any meal, occasion, or dietary preference. Whether you enjoy it as a side dish, appetizer, or even a main course, cheesy garlic bread is versatile and can be transformed into something new and exciting every time.
Tips for the Best Cheesy Garlic Bread Every Time
Preventing Soggy Bread

One of the biggest challenges when making cheesy garlic bread is ensuring that the bread doesn’t turn soggy. The combination of melted butter, garlic, and cheese can sometimes cause the bread to become overly soft or mushy, which can affect the texture and overall enjoyment of the dish. To achieve the perfect crispy exterior and soft, flavorful interior, follow these tips to prevent soggy bread:
1. Use Stale or Day-Old Bread
Freshly baked bread can sometimes be too soft and prone to absorbing too much moisture, which can lead to sogginess when topped with garlic butter and cheese. Using slightly stale or day-old bread is an excellent way to avoid this issue. Older bread has had time to dry out slightly, which helps it retain its structure when toasted and prevents it from becoming soggy.
Tip: If you don’t have stale bread, you can lightly toast the slices in a dry pan or oven before spreading the garlic butter. This will help create a firmer base that can better hold up to the moisture from the butter and cheese.
2. Don’t Overload the Garlic Butter
While it’s tempting to slather on a thick layer of garlic butter, too much butter can cause the bread to absorb excess moisture, leading to a soggy texture. Be generous, but aim for a balanced layer of garlic butter that evenly coats the bread without making it too greasy or wet. A moderate amount ensures that the bread can crisp up without becoming oversaturated.
Tip: You can always add extra garlic butter to the bread after baking for an added burst of flavor, if desired, without risking sogginess.
3. Toast the Bread Before Adding Cheese
If you want to ensure your garlic bread has the perfect crispy texture, consider toasting the bread slices for a few minutes before adding the cheese. Toasting the bread in the oven (at around 350°F for 5-7 minutes) allows it to firm up and create a solid base that can hold the cheese and garlic butter without becoming too soggy.
Tip: If you prefer to make it all in one go, you can also toast the bread under the broiler for a minute or two on each side before adding the garlic butter and cheese. This will help the bread maintain its structure and prevent moisture from soaking in.
4. Layer the Cheese Carefully
The cheese is another key element that can contribute to sogginess if not handled properly. Using too much cheese or placing it too early in the baking process can create moisture that seeps into the bread. To prevent this, sprinkle cheese evenly over the garlic butter, ensuring that there’s enough space for the cheese to melt without pooling on top of the bread.
Tip: To avoid excess moisture from the cheese, choose cheeses with lower moisture content (like a good-quality shredded mozzarella or parmesan) instead of wetter cheeses, which can release excess liquid during baking.
5. Bake at the Right Temperature
Baking the garlic bread at the right temperature is crucial to prevent sogginess. If the oven temperature is too low, the bread will bake too slowly, allowing the butter and moisture from the cheese to seep into the bread. On the other hand, if the temperature is too high, the bread might burn before the cheese has melted properly.
Tip: Preheat your oven to 375°F (190°C) for an even bake. This allows the butter to melt into the bread, the cheese to bubble and brown, and the bread to crisp up without becoming soggy.
6. Avoid Using Too Much Garlic Butter on the Bottom of the Bread
When applying garlic butter, be sure to focus on the top of the bread. While it’s tempting to coat both sides, applying too much garlic butter to the bottom of the bread can create excess moisture that will make the bread soggy. Instead, concentrate on spreading the garlic butter evenly across the top and edges of the bread, where it will provide the most flavor and prevent moisture buildup.
Tip: If you’re baking garlic bread in a pan (like a sheet pan), you can line the pan with parchment paper to catch any excess butter that might drip off, keeping the bread from sitting in a puddle of butter and helping it stay crispy.
7. Bake on a Wire Rack
For extra crispiness, consider baking your cheesy garlic bread on a wire rack set over a baking sheet. This allows air to circulate around the bread as it bakes, preventing moisture from accumulating on the bottom of the slices. The elevated position ensures that the bread crisps up on all sides, giving you that perfect crunchy texture without sogginess.
Tip: If you don’t have a wire rack, you can still place your garlic bread directly on a baking sheet, but be sure to flip it halfway through the baking process to allow both sides to become evenly crispy.
8. Cool Slightly Before Serving
Once your garlic bread has finished baking, resist the urge to serve it immediately. Let it cool for a minute or two before cutting into it. This brief cooling period allows the cheese to firm up and prevents it from oozing too much, which can add extra moisture to the bread. Additionally, it helps the bread maintain its crispy texture for a little longer.
Tip: If you’re not serving the garlic bread right away, consider storing it in a warm oven (at about 170°F) until you’re ready to serve to maintain its crispiness.
By following these simple tips, you can ensure that your garlic bread stays crispy, golden, and free from sogginess. The key is to balance moisture, cheese, and butter while giving the bread enough time to bake and firm up, resulting in a delicious and perfectly textured side dish.
Making It Ahead and Storing Leftovers
Cheesy garlic bread is the perfect dish to prepare in advance, whether you’re planning for a busy weeknight dinner or prepping for a special occasion. Making it ahead of time can save you valuable time and ensure that your meal is as stress-free as possible. Plus, storing leftovers properly allows you to enjoy your cheesy garlic bread for days after. Here’s how to make it ahead and store any leftovers to maintain its flavor and texture:
1. Making Cheesy Garlic Bread Ahead of Time
If you want to make your cheesy garlic bread in advance, the process can be broken into a few simple steps that ensure it stays fresh and flavorful.
Step 1: Prepare the Garlic Butter Mixture
You can make the garlic butter mixture ahead of time and store it in an airtight container in the refrigerator for up to a week. This way, when you’re ready to assemble your garlic bread, the butter is already prepared and easy to spread.
Step 2: Assemble the Bread
Once the garlic butter is ready, you can assemble the bread by spreading it onto your chosen slices of bread and adding the cheese. Instead of baking it immediately, cover the assembled bread with plastic wrap or foil and store it in the refrigerator for up to 24 hours. This allows the bread to absorb some of the garlic butter flavor and makes for a quick, ready-to-bake dish when you’re ready to serve it.
Tip: For a quicker meal, you can prep the bread and cheese without baking it, then pop it into the oven right before dinner to ensure it’s hot and fresh.
Step 3: Freeze for Long-Term Storage
If you want to make cheesy garlic bread even further in advance, you can freeze the assembled bread. To do so, prepare the bread slices as you would, but instead of refrigerating them, wrap them tightly in plastic wrap or aluminum foil. Afterward, place the wrapped bread in a freezer-safe bag or container. The garlic bread will keep in the freezer for up to three months.
When you’re ready to bake it, simply take it out of the freezer and let it thaw in the fridge for a few hours (or overnight) before baking as directed. If you’re in a rush, you can bake it directly from the freezer, but you may need to add a few extra minutes to the baking time.
2. Storing Leftovers
If you have leftover cheesy garlic bread (which is rare, but it happens!), storing it properly will help keep it fresh for a few days. Here’s how to store and reheat your leftovers:
Step 1: Cool It Down
Before storing your leftover garlic bread, let it cool completely. If you store it while still warm, the condensation will make the bread soggy, and it won’t retain its crispy texture.
Step 2: Store in an Airtight Container
Once cooled, place the leftover garlic bread in an airtight container or wrap it tightly in plastic wrap or foil. This helps preserve the flavor and prevents the bread from drying out. For optimal freshness, store the garlic bread in the refrigerator for up to 2-3 days.
Step 3: Keep It Separate
If you have leftover garlic bread that’s topped with cheese and garlic butter, it’s best to store it separately from any other foods. This prevents the bread from absorbing odors or flavors from other items in the fridge.
3. Reheating Leftovers
Reheating cheesy garlic bread properly is key to ensuring it stays as close to fresh as possible. Here’s how to reheat your leftover bread to retain its crispy texture:
Option 1: In the Oven
Preheat your oven to 350°F (175°C). Place the leftover garlic bread on a baking sheet, cover it loosely with foil (to prevent the cheese from over-browning), and heat for 8-10 minutes, or until warmed through and crispy. For a crispier result, you can remove the foil during the last few minutes of reheating.
Option 2: On a Skillet
If you’re in a rush, you can reheat your garlic bread on the stovetop. Heat a non-stick skillet over medium heat and place the garlic bread in the pan, covering it with a lid. Let it cook for about 3-5 minutes, checking regularly to ensure the bread doesn’t burn. This method is perfect for smaller portions or single slices.
Option 3: Under the Broiler
For a quick and crispy reheating method, you can place the leftover garlic bread under the broiler for 1-2 minutes. Keep a close eye on it, as it can burn quickly. This method is great if you want to restore the bread’s crunchiness and melt the cheese once more.
4. Freezing Leftovers
If you’ve got more leftover cheesy garlic bread than you can eat in a few days, freezing it is a great option for long-term storage. Here’s how:
Step 1: Let It Cool Completely
Before freezing, allow the garlic bread to cool down completely to avoid moisture buildup inside the packaging.
Step 2: Wrap It Up
Wrap the leftover garlic bread tightly in plastic wrap or aluminum foil to prevent freezer burn. You can also place the wrapped bread in a freezer-safe bag for added protection.
Step 3: Freeze
Store the wrapped garlic bread in the freezer for up to 3 months. When you’re ready to enjoy it again, let it thaw in the refrigerator overnight, and then reheat using one of the methods described earlier.
Tip: To make the process easier, slice the garlic bread before freezing so you can take out individual pieces as needed.
By making your cheesy garlic bread ahead of time or storing leftovers properly, you can enjoy this delicious dish even when you’re short on time. Whether you store it in the fridge or freeze it for later, you’ll always have a tasty, comforting treat on hand when you need it.
Customizing to Your Taste
One of the best things about cheesy garlic bread is its versatility. With just a few simple ingredients, you can easily tailor it to suit your taste preferences, dietary needs, or the flavors of the meal you’re serving. From adjusting the garlic level to experimenting with different types of cheese, there are countless ways to make this dish your own. Here are some ideas to help you customize your cheesy garlic bread to match your unique flavor profile:
1. Adjust the Garlic Intensity
The amount of garlic in your garlic bread can be a personal preference. If you love a strong garlic flavor, you can increase the amount of minced garlic in your garlic butter mixture. On the other hand, if you prefer a milder taste, use less garlic or opt for roasted garlic, which has a sweeter, more subtle flavor than raw garlic.
Tip: Roasted garlic can be mashed into the butter for a creamy, slightly caramelized flavor. If you want an extra kick, you can also sprinkle some garlic powder or garlic flakes on top after baking for added intensity.
2. Choose Your Favorite Cheeses
The type of cheese you use plays a major role in determining the flavor and texture of your cheesy garlic bread. While mozzarella is the classic choice for its meltiness and mild flavor, there are plenty of other cheeses you can experiment with. Parmesan, for example, adds a sharp, nutty flavor, while sharp cheddar gives the bread a richer taste. For a more indulgent twist, you could use fontina, gouda, or even cream cheese for extra creaminess.
Tip: Mixing different cheeses can create a more complex flavor. A combination of mozzarella for meltiness, cheddar for sharpness, and Parmesan for a salty kick is a classic, but feel free to get creative with your favorite cheeses.
3. Add Fresh Herbs and Spices
Garlic bread is a perfect base for experimenting with herbs and spices. Fresh herbs like basil, parsley, rosemary, or thyme can add a burst of flavor and color. You can chop up the herbs finely and sprinkle them into the garlic butter mixture or sprinkle them on top of the bread just before serving. For those who like a little heat, try adding red pepper flakes or cayenne pepper to the garlic butter for a spicy kick.
Tip: Fresh parsley is a classic, but rosemary pairs beautifully with garlic for an earthy, aromatic flavor. For an extra fresh twist, try adding some chopped chives or a sprinkle of fresh oregano.
4. Make It Spicy
For those who enjoy spicy flavors, there are several ways to give your cheesy garlic bread a fiery twist. You can add finely chopped fresh chili peppers (such as jalapeños or serrano peppers) to the garlic butter mixture or sprinkle red pepper flakes on top before baking. If you like an extra smoky heat, try adding a little smoked paprika or chili powder for an added depth of flavor.
Tip: For an added layer of spice, drizzle some hot sauce (such as Sriracha or buffalo sauce) over the bread before serving or use a spicy cheese, like pepper jack, in the cheese blend.
5. Incorporate Sweet and Savory Flavors
Cheesy garlic bread doesn’t have to be all savory. For a sweet and savory twist, you can drizzle a small amount of honey or balsamic glaze over the top after baking. This combination works particularly well with sharp cheeses like Parmesan or aged cheddar. Additionally, caramelized onions or roasted garlic can enhance the sweetness of the bread while still maintaining that delicious garlicky flavor.
Tip: Top your bread with a few thin slices of apple or pear, paired with a sprinkle of cinnamon, to balance the savory garlic with a hint of sweetness. This is a great way to add depth to your garlic bread when serving alongside roasted meats or hearty stews.
6. Vegetarian and Vegan Options
If you’re following a vegetarian or vegan diet, it’s easy to make cheesy garlic bread that fits your preferences. For a vegan version, swap the butter for plant-based alternatives, like vegan butter or olive oil, and use dairy-free cheese options such as cashew-based cheese, almond milk mozzarella, or vegan parmesan. Nutritional yeast is also an excellent vegan alternative that provides a cheesy flavor without dairy.
Tip: Adding roasted vegetables like bell peppers, mushrooms, or spinach on top of vegan cheesy garlic bread can give it an extra boost of flavor and texture.
7. Make It Gluten-Free
For those following a gluten-free diet, you can easily make cheesy garlic bread using gluten-free bread. Choose a high-quality gluten-free loaf to ensure the bread holds up well when baked. Many gluten-free breads are available with varying textures, so look for one with a slightly denser or chewier texture to ensure the bread holds its shape and doesn’t get too soggy.
Tip: If you’re making gluten-free garlic bread, check the bread’s ingredients to ensure it has a good balance of moisture and structure. Pairing it with a dairy-free or gluten-free cheese can ensure the dish fits both dietary restrictions.
8. Add Protein for a Hearty Meal
For a heartier version of cheesy garlic bread, you can add protein on top. Grilled chicken, bacon bits, or even sliced steak can be piled onto the bread for an extra protein boost. If you want to keep it vegetarian, roasted chickpeas, sautéed mushrooms, or scrambled eggs are great alternatives to meat.
Tip: Chicken parmesan cheesy garlic bread is a great variation—simply top the bread with sliced grilled or breaded chicken and marinara sauce along with your melted cheese for a delicious, more substantial dish.
9. Change the Bread Type
While traditional garlic bread uses baguette or French bread, you can experiment with different types of bread to give your dish a new twist. Ciabatta, focaccia, and even sourdough are excellent alternatives that provide different textures and flavors. For a slightly sweeter twist, you could even use a lightly sweetened bread like Hawaiian rolls for a more decadent version of cheesy garlic bread.
Tip: Focaccia is an excellent choice for adding extra herbs and seasonings like rosemary, thyme, and sea salt. For a fun twist, try using a bread with seeds or nuts for extra crunch and flavor.
By customizing your cheesy garlic bread, you can create endless variations that match your preferences or fit perfectly with the meal you’re serving. Whether you go for extra garlic, a spicy kick, or a more indulgent combination of cheeses and herbs, cheesy garlic bread can be tailored to suit any taste or dietary need.
Frequently Asked Questions (FAQs)
Can I Use a Different Type of Bread?
While traditional cheesy garlic bread is typically made with French bread or a baguette, the beauty of this dish lies in its versatility. You can absolutely experiment with different types of bread to change the texture and flavor of your cheesy garlic bread. The key is to choose a bread that complements the garlic butter and cheese without becoming too soggy or losing its shape. Here are some fantastic alternatives to the classic French bread, each offering its own unique twist:
1. Ciabatta
Ciabatta is an excellent alternative to French bread for cheesy garlic bread. Its rustic, airy texture and slightly chewy crumb create a great foundation for the garlic butter mixture. The porous structure of ciabatta allows the butter and cheese to seep in, creating a perfect balance of crispiness on the outside and softness on the inside.
Tip: Ciabatta’s open crumb structure allows for more cheese to melt into the bread, so you may want to use a little less butter if you’re worried about it becoming too greasy.
2. Focaccia
Focaccia is a fantastic choice for making cheesy garlic bread if you’re looking for a bread with more flavor and texture. This Italian flatbread is usually soft, slightly oily, and infused with herbs like rosemary, making it a natural pairing for garlic and cheese. The thick, airy texture of focaccia helps the toppings stay in place while baking, giving you a hearty and flavorful dish.
Tip: If you’re using focaccia, you can skip adding extra herbs to the garlic butter, as the bread itself already has a lovely herby flavor. Just focus on the cheese and garlic for a perfect combination.
3. Sourdough
For a tangy twist, try using sourdough bread. The natural tanginess from the sourdough starter adds a unique layer of flavor that pairs wonderfully with the rich garlic butter and melted cheese. Sourdough’s slightly denser texture also holds up well when baked, ensuring the bread doesn’t get soggy while still achieving a crisp crust.
Tip: Because sourdough can be a little denser than other breads, consider slicing it a bit thinner for better crispiness. The tangy notes of the sourdough will pair well with sharper cheeses like Parmesan or cheddar.
4. Hawaiian Rolls
If you’re looking for a sweeter take on cheesy garlic bread, Hawaiian rolls are a fun and indulgent option. Their soft, slightly sweet flavor creates a delightful contrast to the savory garlic butter and melted cheese. This type of bread results in a sweeter, more decadent garlic bread that is especially popular with kids or those who enjoy a balance of sweet and savory flavors.
Tip: Hawaiian rolls are often smaller and softer, so they bake more quickly. Keep an eye on them to prevent burning, as they can crisp up faster than denser breads.
5. Whole Wheat Bread
For a healthier take on cheesy garlic bread, whole wheat bread is an excellent choice. It offers a nutty flavor and a denser texture, which helps to hold up the garlic butter and cheese while still providing a substantial bite. Whole wheat bread is also higher in fiber and nutrients, making it a more wholesome option without sacrificing flavor.
Tip: Whole wheat bread can have a more robust flavor that may overpower the garlic and cheese if used in large quantities. Consider using a light spread of garlic butter and a milder cheese to maintain balance.
6. Gluten-Free Bread
If you follow a gluten-free diet, you can still enjoy cheesy garlic bread by using a gluten-free bread variety. Many gluten-free breads are available in stores, and some varieties, like gluten-free baguettes or ciabatta-style loaves, can closely mimic the texture of traditional bread. Just be sure to choose a bread that has a good texture to hold up under the garlic butter and cheese without becoming soggy.
Tip: Some gluten-free breads can be a little more delicate or crumbly than traditional breads, so handle them carefully. Toasting the bread lightly before adding the garlic butter can help improve its texture and prevent sogginess.
7. Bagels
For a fun twist, try using bagels for your cheesy garlic bread. The chewy texture and dense crumb of bagels provide a unique base for the garlic butter and cheese. Bagels can hold up well in the oven, creating a satisfying crispness on the outside while staying soft on the inside. This variation is perfect for a more substantial and filling garlic bread, especially when serving as a side to a hearty meal.
Tip: If using bagels, slice them in half horizontally to ensure an even spread of garlic butter and cheese. The small surface area of bagels means the bread will bake more quickly, so keep a close eye on them in the oven.
8. English Muffins
English muffins are another great alternative for cheesy garlic bread. Their nooks and crannies absorb the garlic butter and cheese, creating an incredibly satisfying texture. When baked, English muffins turn crispy on the outside but remain soft and tender on the inside, making them a perfect vehicle for a garlic bread topping.
Tip: For a fun variation, you can top your English muffin garlic bread with a few fresh herbs or additional toppings like bacon bits, olives, or even a drizzle of honey for a sweet-savory contrast.
9. Pita Bread
Pita bread is an excellent choice for a lighter version of cheesy garlic bread. Its thin, soft texture crisps up nicely when toasted, and it’s easy to cut into smaller portions for serving as appetizers or snacks. Pita bread has a neutral flavor, which makes it an ideal base for garlic butter and cheese without overpowering the other ingredients.
Tip: For a more rustic look, you can cut pita bread into wedges, spread the garlic butter on each wedge, and bake them to create mini cheesy garlic bread pieces perfect for dipping.
10. Brioche
For a rich and indulgent version of cheesy garlic bread, brioche is an excellent option. This buttery, slightly sweet bread has a tender crumb that’s perfect for soaking up garlic butter while still maintaining a light, airy texture. Brioche’s richness pairs beautifully with both mild and sharp cheeses, creating a decadent and melt-in-your-mouth experience.
Tip: Since brioche is rich and buttery on its own, you may want to use a lighter hand with the garlic butter to avoid overwhelming the flavor. A mild cheese like mozzarella or a tangy goat cheese would work wonderfully with brioche.
Which Bread Is Best?
The best type of bread ultimately depends on your personal preference and the texture you desire for your cheesy garlic bread. For a classic, crisp exterior and soft interior, go for French bread or a baguette. If you’re craving something more flavorful or indulgent, consider ciabatta, focaccia, or brioche. And if you have dietary restrictions, gluten-free, whole wheat, or even pita bread can be excellent alternatives.
Experimenting with different types of bread is an easy way to put your own spin on this beloved dish. Whether you opt for a crusty loaf or a soft, buttery bread, the garlic butter and melted cheese will always shine through.
How Can I Make This Without an Oven?
While the oven is the traditional method for making cheesy garlic bread, it’s entirely possible to make this delicious treat without one! Whether you don’t have access to an oven, want to avoid heating it up, or are simply looking for a quicker alternative, there are several other ways to prepare cheesy garlic bread. Here are a few methods you can try to achieve that perfect garlic-butter, cheesy crunch without using your oven:
1. Stovetop Skillet Method
One of the easiest and quickest ways to make cheesy garlic bread without an oven is by using a stovetop skillet. This method is perfect for achieving a crispy, golden crust on your bread while the cheese melts perfectly. Here’s how you can do it:
How-To:
- Heat a non-stick skillet or cast-iron pan over medium heat.
- Spread your prepared garlic butter mixture onto the bread as you normally would.
- Place the bread, buttered side down, into the hot skillet.
- Cover the skillet with a lid to trap the heat and help the cheese melt.
- Cook for about 2-4 minutes, checking occasionally to ensure the bread is golden and crispy.
- Once the cheese is melted and the bread is crispy, remove from the skillet and serve!
Tip: To get even more melt on your cheese, you can add a splash of water to the skillet before covering it, which will create steam and help the cheese melt faster.
2. Griddle or Panini Press Method
If you have a griddle or panini press, these appliances are perfect for making cheesy garlic bread. They heat up quickly and provide an even surface to crisp the bread while melting the cheese perfectly.
How-To:
- Preheat your griddle or panini press to medium heat.
- Spread your garlic butter mixture on the bread and add your cheese.
- Place the bread on the preheated griddle or panini press, and close it (if using a panini press) or simply press down gently (if using a griddle).
- Cook for about 3-5 minutes, flipping halfway if using a griddle, until the bread is crispy and the cheese has melted.
Tip: You can press the bread down slightly to ensure a nice, even crust on both sides. If you have a panini press with adjustable heat settings, use medium heat to prevent burning the bread while allowing the cheese to melt.
3. Microwave and Skillet Combo
If you don’t have a stove or griddle but do have a microwave, you can use a combination of the microwave and a skillet to make cheesy garlic bread. This method ensures you can still get the melted cheese and garlic-butter goodness, even without an oven.
How-To:
- Start by spreading your garlic butter on the bread and adding the cheese.
- Place the bread in the microwave for about 30-60 seconds to quickly melt the cheese.
- Meanwhile, heat a non-stick skillet over medium heat.
- Once the cheese has melted in the microwave, transfer the bread to the skillet.
- Cook the bread on the skillet for about 1-2 minutes until the bottom becomes golden and crispy.
Tip: Be careful not to over-microwave the bread, as it can become too soggy. The microwave is just to melt the cheese, while the skillet gives it that crispy, toasted bottom.
4. Toaster Oven Method
If you don’t want to use a full-sized oven but still want that oven-baked flavor, a toaster oven is an excellent alternative. It provides the same direct heat as a regular oven but in a more compact form. Plus, it’s great for making small batches of cheesy garlic bread!
How-To:
- Preheat your toaster oven to 375°F (190°C).
- Prepare your garlic butter and cheese on the bread as usual.
- Place the bread on a baking tray or directly on the toaster oven rack.
- Bake for 5-7 minutes, or until the cheese is melted and the bread is golden brown and crispy.
Tip: Keep an eye on the bread, as toaster ovens tend to cook faster than traditional ovens. If you’re making a small batch, check the bread often to avoid burning.
5. Air Fryer Method
The air fryer is a fantastic option for making cheesy garlic bread quickly and with minimal effort. It uses hot air circulation to crisp the bread and melt the cheese in a fraction of the time it would take in an oven.
How-To:
- Preheat your air fryer to 375°F (190°C).
- Spread your garlic butter mixture on the bread, then top with cheese.
- Place the bread in the air fryer basket in a single layer (you may need to work in batches depending on the size of your air fryer).
- Air fry for 3-5 minutes, checking after 3 minutes to ensure the bread doesn’t burn.
Tip: If you have thicker slices of bread, you may need to adjust the cooking time slightly. You can also sprinkle a bit of garlic powder or Parmesan on top before air frying for an extra flavor boost.
6. Slow Cooker Method
For a more hands-off approach, a slow cooker can be a good tool for making cheesy garlic bread. Although it won’t get the bread as crispy as some of the other methods, it still produces a delicious, gooey, cheesy result.
How-To:
- Spread the garlic butter on your bread slices, then add your cheese.
- Line the bottom of the slow cooker with parchment paper to prevent sticking.
- Place the bread slices inside the slow cooker in a single layer.
- Cover and cook on high for 1-1.5 hours, or until the bread is heated through and the cheese is melted. Keep an eye on it to avoid burning.
Tip: To create a crispy crust, you can briefly broil the bread slices in a skillet after slow cooking to add that golden, crispy texture.
Which Method Is Best?
Each method has its own advantages, depending on the tools you have available and the results you’re looking for. The stovetop skillet or griddle method is probably the most straightforward, providing both a crispy exterior and melty cheese. The air fryer and toaster oven are both fast and efficient, while the microwave-and-skillet combo is ideal for those short on time. If you’re looking for a more slow-cooked approach, the slow cooker is a great option, though it won’t give you the crispy texture of other methods.
No matter which alternative method you choose, you can still enjoy the same delicious, cheesy, garlicky goodness without an oven. It’s all about finding the right technique for your situation!
What’s the Best Way to Reheat Garlic Bread?
Garlic bread is often one of those dishes that’s even better the next day, but reheating it can be tricky. You want to bring back that crispy crust, gooey cheese, and garlicky goodness without ending up with a soggy, rubbery mess. Luckily, there are a few tried-and-true methods for reheating garlic bread to perfection. Here’s how to reheat it in different ways while maintaining its delicious texture and flavor.
1. Oven Method (For Crispy Crust and Even Heating)
The oven is the best option for reheating garlic bread if you want to restore its crispy texture and ensure the cheese remains melted. It’s especially great if you have a larger batch to reheat.
How-To:
- Preheat your oven to 350°F (175°C).
- Place the garlic bread on a baking sheet. If it’s already sliced, you can arrange the slices in a single layer.
- Cover the bread loosely with aluminum foil to prevent it from drying out, but leave the top exposed so the crust can crisp up.
- Bake for 5-10 minutes, checking every few minutes to ensure the bread doesn’t overcook. For extra crispiness, remove the foil during the last 2-3 minutes of baking.
- Once the cheese is melted and the bread is hot and crispy, remove from the oven and serve.
Tip: If you have only a few slices and want them extra crispy, you can place them directly on the oven rack for a more direct heat on the bottom.
2. Skillet Method (For a Quick, Crispy Result)
Reheating garlic bread in a skillet on the stovetop is a fantastic option when you’re short on time and want to bring back that crispy crust. This method works well for individual slices or small batches of bread.
How-To:
- Heat a non-stick skillet or cast-iron pan over medium heat.
- Place the garlic bread in the skillet, cut side up.
- Cover the pan with a lid or foil to trap heat and ensure even heating.
- Heat for about 2-4 minutes, checking frequently to avoid burning the bread. If the bread is thick or particularly crusty, you can flip it to ensure even heating on both sides.
- Once the bread is hot and crispy, remove from the skillet and serve.
Tip: For a little extra flavor, you can add a small dab of butter to the skillet before placing the bread in. This will give the crust a golden-brown finish and an extra burst of flavor.
3. Toaster Oven Method (For Small Batches or Quick Reheat)
A toaster oven is an excellent alternative to a regular oven for reheating garlic bread, especially if you’re reheating just a few slices. It heats up quickly and crisps the bread without making it too dry.
How-To:
- Preheat your toaster oven to 375°F (190°C).
- Place the garlic bread on the toaster oven tray or directly on the oven rack.
- Reheat for 5-7 minutes, or until the cheese is bubbly and the crust is crispy.
- Keep an eye on the bread to prevent burning, as toaster ovens tend to cook quickly.
Tip: If your toaster oven has a broil setting, you can use it for the last 1-2 minutes of reheating to get a crispy, golden top.
4. Microwave Method (For Quick and Convenient, But Less Crispy)
If you’re in a real hurry and just need to quickly reheat garlic bread, the microwave is the most convenient option. However, be aware that microwaving can make the bread soggy and lose its crispiness. To minimize this, you can use a few tricks.
How-To:
- Place the garlic bread on a microwave-safe plate.
- Drape a damp paper towel over the bread to help keep moisture in and prevent it from drying out.
- Microwave on high for about 10-15 seconds for a single slice, or 30 seconds for a whole piece.
- If you have multiple slices, reheat in intervals, checking after each one.
Tip: If you’re microwaving a thick loaf of garlic bread, you can slice it first to ensure more even heating. The microwave won’t make it crispy, but it will warm it up and soften the cheese.
5. Air Fryer Method (For Extra Crispiness)
The air fryer is a great tool for reheating garlic bread because it circulates hot air around the bread, creating a crisp exterior and evenly heated interior without drying it out.
How-To:
- Preheat your air fryer to 350°F (175°C).
- Place the garlic bread in the air fryer basket in a single layer. If you’re reheating multiple slices, you may need to do it in batches.
- Air fry for 3-5 minutes, or until the cheese is melted and the bread is crispy.
- Check frequently to ensure it doesn’t burn, as air fryers cook quickly.
Tip: For an extra crispy result, you can lightly brush the bread with a bit of olive oil or melted butter before reheating in the air fryer.
6. Grill Method (For a Smoky, Crispy Finish)
If you’re already grilling something outdoors or want to add a smoky flavor to your garlic bread, you can use a grill to reheat it. This method provides a crisp crust and can be a fun way to warm up leftover garlic bread, especially in the summer months.
How-To:
- Preheat your grill to medium heat (around 350°F or 175°C).
- Place the garlic bread on the grill grates, cut side up.
- Grill for 2-4 minutes, checking frequently to ensure the bread doesn’t burn.
- Flip the bread over for the last minute if you want to get a more even crispiness on both sides.
- Once heated through and crispy, remove the bread from the grill and serve.
Tip: Keep the lid of the grill closed to trap heat and help melt the cheese evenly. You can also wrap the bread in foil to prevent it from burning while keeping it moist.
Which Reheating Method Is Best?
The best method for reheating garlic bread depends on your preference for texture and how much time you have. If you’re looking for a quick and crispy result, the stovetop skillet, air fryer, or oven methods are your best bets. For convenience, the microwave works well, but it won’t give you that same crispy texture. If you want a smoky, grilled flavor and have access to a grill, that’s also a fun option. Ultimately, reheating garlic bread is all about achieving that perfect balance between melty cheese, garlicky goodness, and a crunchy, golden crust.
No matter how you choose to reheat it, garlic bread is always a treat, and with the right technique, you can enjoy it just as much as when it was freshly made!
Conclusion
This Cheesy Garlic Bread recipe truly lives up to its name – it’s the ultimate combination of buttery, garlicky, crispy, and cheesy perfection. Whether you’re serving it as a side to your favorite pasta, a snack, or a crowd-pleasing appetizer, it’s bound to be a hit at your dinner table. With simple ingredients and a few easy steps, you can create a loaf that’s crispy on the outside, soft and gooey on the inside, and loaded with flavor. It’s the kind of dish that makes any meal feel special!
I encourage you to give this recipe a try and see for yourself how easy and delicious it is. Don’t forget to leave a comment and let me know how it turned out – I love hearing your feedback and seeing how you customize it!
If you’re looking for more quick and tasty side dishes to pair with this cheesy garlic bread, be sure to explore some of my other recipes. From savory pasta sides to fresh salads, there’s a whole collection of easy and delicious dishes waiting for you to try.
Enjoy, and happy cooking!