

Visit the American Academy of Pediatrics
Craving warm, homemade cookies but short on time? Look no further—this Rumbl Cookie Recipe is here to save the day! Whether you’re a busy parent, a baking newbie, or just someone with a sweet tooth, these cookies promise to deliver quick, easy, and delicious results with minimal fuss.
Imagine biting into a soft, chewy cookie with golden edges and a melt-in-your-mouth texture—all made from scratch in under 30 minutes. No fancy tools, no complicated steps, and no endless ingredient lists! We’ve perfected this recipe to balance simplicity and flavor, using pantry staples like butter, brown sugar, and vanilla extract to create irresistible homemade Rumbl cookies that rival any bakery treat.
The real magic? This recipe adapts to whatever you’re craving. Add chocolate chips for a classic twist, toss in nuts for crunch, or keep it plain and buttery—the choice is yours! We’ll even share pro tips to avoid common pitfalls (like flat or overbaked cookies) and reveal secrets for achieving your ideal texture, whether you prefer chewy, crispy, or soft.
So grab your mixing bowl and preheat that oven—it’s time to bake a batch of homemade Rumbl cookies that’ll have everyone begging for seconds. Let’s get started!
Ingredients & Tools You’ll Need
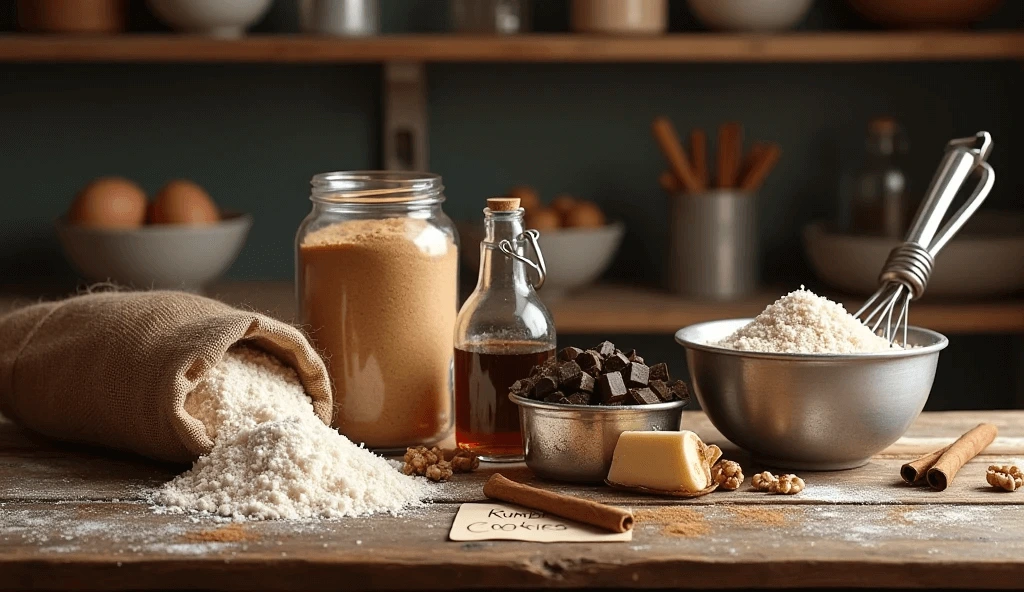
Essential Ingredients for Homemade Rumbl Cookies
To recreate that signature Rumbl cookie magic at home, you’ll need a few key ingredients that work together to deliver that perfect texture—crisp on the edges, soft in the center—and irresistible flavor. Here’s a breakdown of the must-haves and why each one matters:
1. Unsalted Butter
Room-temperature unsalted butter gives these cookies their rich, buttery base. It also helps achieve that soft, melt-in-your-mouth texture. Always go for high-quality butter—it makes a difference!
2. Brown Sugar & Granulated Sugar
A blend of brown sugar and white sugar is essential for achieving the ideal balance of moisture, sweetness, and texture. Brown sugar adds moisture and a subtle caramel flavor thanks to the molasses, while white sugar brings sweetness and helps the cookies spread just right.
3. Eggs
Eggs bind everything together and add moisture, which contributes to the soft, chewy texture Rumbl cookies are known for. Using large eggs that have reached room temperature helps ensure even mixing and a better cookie texture.
4. Vanilla Extract
A splash of pure vanilla extract deepens the overall flavor profile and complements the sweetness in a way that feels nostalgic and bakery-fresh.
5. All-Purpose Flour
This pantry staple provides structure to the cookies. Be sure to measure it correctly—too much can lead to dense cookies, while too little may cause spreading.
6. Cornstarch
This secret ingredient softens the cookie’s crumb and adds a melt-away texture that sets Rumbl cookies apart. Even a small amount can make a big difference in the texture.
7. Baking Soda
Baking soda gives the cookies lift and helps them brown beautifully. It reacts with the brown sugar to create that lovely golden color and light texture.
8. Salt
A small pinch of salt balances out the sweetness and enhances all the other flavors—never skip it!
9. Chocolate Chunks or Chips
Use high-quality chocolate chunks or chips for the ultimate gooey, melty finish. Mix dark and semi-sweet varieties for extra depth, or customize with white chocolate, toffee bits, or caramel chips if you’re feeling adventurous.
Optional Add-Ins for Extra Flavor
While the classic Rumbl cookie base is already rich and delicious, you can easily elevate your cookies with some fun and flavorful add-ins. These optional ingredients let you personalize each batch to match your cravings—or impress your guests with gourmet-style cookies right from your kitchen.
1. Chopped Nuts
Add a satisfying crunch and nutty flavor with chopped walnuts, pecans, or macadamia nuts. Lightly toasting the nuts enhances their flavor and releases their natural oils for a richer taste.
2. Sea Salt Flakes
Adding a pinch of sea salt flakes on top before baking gives the cookies that irresistible sweet-and-salty balance, just like your favorite bakery treats. It also looks fancy without any extra effort!
3. Shredded Coconut
Mixing in unsweetened shredded coconut brings a subtle tropical flair and a pleasantly chewy bite to the cookies. It adds a subtle chewiness and pairs beautifully with chocolate or caramel chips.
4. Toffee Bits
Toffee bits melt slightly as they bake, creating little pockets of buttery, caramelized goodness. Great for taking your cookies to the next level of indulgence.
5. Dried Fruit
Chopped dried cherries, cranberries, or golden raisins bring a pop of tart-sweet flavor that balances the richness of the dough. This is especially nice if you’re aiming for a more sophisticated cookie.
6. Espresso Powder
A small pinch of espresso powder enhances the chocolate flavor without making the cookies taste like coffee—though you can lean into the mocha vibe if you want!
7. Mini Marshmallows
Fold in a few mini marshmallows for a gooey center or toast them slightly after baking for a campfire-inspired cookie.
8. Sprinkles or Crushed Candy
For a festive look and a little crunch, mix in colorful sprinkles or crushed candy bars. This is especially fun for holidays or kids’ parties.
9. Peanut Butter Swirls
Add small spoonfuls of peanut butter and gently swirl it through the dough before portioning it out. It adds richness and that classic PB-chocolate combo everyone loves.
These add-ins are easy to mix and match—just don’t go overboard! About 1 to 1½ cups total of extras per batch is a good rule of thumb.
Must-Have Baking Tools
Baking the perfect Rumbl cookie isn’t just about the ingredients—it’s also about having the right tools to get the job done efficiently and consistently. Whether you’re a beginner baker or a seasoned pro, these kitchen essentials will make your cookie-baking experience smoother and more successful:
1. Mixing Bowls (Preferably Stainless Steel or Glass)
A good set of mixing bowls in various sizes helps you stay organized while prepping your wet and dry ingredients separately. Stainless steel or glass is ideal—they’re durable, easy to clean, and don’t absorb odors.
2. Electric Mixer (Stand or Hand)
Creaming butter and sugar thoroughly is key for the perfect cookie texture. An electric mixer makes this step effortless and ensures everything is evenly combined. A stand mixer is great for large batches, while a hand mixer is perfect for smaller ones.
3. Measuring Cups and Spoons
Precision is everything in baking. Use dry measuring cups for flour and sugar, liquid measuring cups for milk or vanilla extract, and accurate measuring spoons for smaller ingredients like salt and baking soda.
4. Silicone Spatula
This versatile tool helps you scrape down the sides of your bowl without leaving any batter behind. It’s also handy for folding in chocolate chips or other mix-ins without over-mixing.
5. Cookie Scoop
Want evenly sized cookies that bake uniformly? A cookie scoop is a game changer. It also makes portioning dough cleaner and faster, so every cookie looks as good as it tastes.
6. Baking Sheets
Invest in heavy-duty, rimmed baking sheets—they hold their shape, bake more evenly, and won’t warp at high temperatures. Bonus points for having more than one so you can rotate trays for back-to-back batches.
7. Parchment Paper or Silicone Baking Mats
Instead of using cooking spray, opt for parchment paper or silicone baking mats to prevent sticking and promote even baking. They prevent sticking, promote even browning, and make cleanup a breeze.
8. Cooling Rack
Transferring cookies to a cooling rack prevents sogginess from trapped steam and helps them firm up just right. Letting them cool completely also brings out the best flavor and texture.
9. Oven Thermometer
Most ovens run a little hot or cold, which can affect your results. An oven thermometer ensures you’re baking at the correct temperature every time.
Having these tools on hand doesn’t just improve your results—it makes the whole baking process more enjoyable and stress-free.
Step-by-Step Rumbl Cookie Recipe
Prep Work: Creaming Butter and Sugar
Creaming butter and sugar is one of the most important steps in cookie making—it’s where texture and flavor truly begin to develop. Get this part right, and you’re well on your way to perfect homemade Rumbl cookies.
What Does “Creaming” Mean?
Creaming is the process of beating together butter and sugar until the mixture becomes light, fluffy, and pale in color. This step incorporates air into the dough, which helps your cookies rise slightly and creates that soft, tender texture Rumbl cookies are known for.
Why It Matters
Properly creamed butter and sugar set the stage for every other ingredient. It ensures your cookies have a consistent crumb, helps distribute the sweetness evenly, and creates a smooth dough that’s easy to mix with eggs, flour, and flavorings later on.
How to Do It Right
- Start with room-temperature butter. The butter should be pliable enough to leave a mark when pressed, yet firm enough to maintain its shape. Cold butter won’t blend well, and melted butter skips the aeration process altogether.
- Use the right tools. A stand mixer with a paddle attachment is the best option, but a hand mixer will also do the job well. You can do it by hand with a wooden spoon, though it takes a bit of elbow grease!
- Mix for 2–4 minutes. Beat the butter and sugar on medium speed until the mixture is pale and fluffy. Scrape down the sides of the bowl once or twice to make sure everything is evenly combined.
- Don’t rush it. Under-creaming leads to dense cookies, while over-creaming can cause too much spread. Aim for a smooth, creamy texture with no visible sugar crystals.
Pro Tip:
If you’re using brown sugar, make sure it’s fresh and soft—hardened sugar won’t cream properly. And if your kitchen is chilly, cut the butter into small cubes and let it sit out for 15–20 minutes to warm up quickly.
This step may seem simple, but it lays the foundation for everything that follows.
Mixing and Shaping the Dough
Once you’ve creamed the butter and sugar to perfection, it’s time to bring the rest of your cookie dough together. This stage is all about balance—incorporating ingredients thoroughly without overworking the dough, and shaping each cookie so it bakes evenly and beautifully.
Step 1: Add the Wet Ingredients
Once the butter and sugar are properly blended, beat in the eggs and vanilla until everything is smoothly incorporated. The eggs contribute both moisture and structure, while the vanilla enhances the overall flavor. Be sure to mix everything together thoroughly before proceeding.
Step 2: Slowly Incorporate the Dry Ingredients
In a separate bowl, whisk together your dry ingredients—typically flour, baking soda, cornstarch, and salt. Gradually incorporate the dry ingredients into the wet mixture, adding them in portions. Mix on low speed (or by hand with a spatula) to prevent flour clouds and overmixing.
Tip: Cease mixing once the flour is fully incorporated and no longer visible. Overworking the dough can lead to tough cookies, and we’re going for that soft, chewy Rumbl cookie texture!
Step 3: Fold in Your Add-Ins
Whether you’re going with chocolate chips, chopped nuts, toffee bits, or a fun combo, gently fold your mix-ins into the dough. This ensures an even distribution without breaking them up or compressing the dough.
Step 4: Chill If Needed (Optional but Recommended)
If your dough feels too soft or sticky, chill it in the fridge for 20–30 minutes. This makes it easier to shape and helps prevent the cookies from spreading too much in the oven. Bonus: chilled dough also enhances the flavor.
Step 5: Portion the Dough
Use a cookie scoop or spoon to portion out equal-sized balls of dough. This helps guarantee that all your cookies bake uniformly. Standard size is about 1.5 tablespoons per cookie, but you can go bigger for bakery-style treats.
Shaping Tip: For that signature crinkled top, gently roll each dough ball in your hands and slightly press down the center before baking.
Baking to Perfection
Baking Rumbl cookies to perfection requires a little attention to detail and patience, but the results are definitely worth it. The key is achieving that perfect balance of crisp edges and soft, chewy centers. Here’s a step-by-step guide to help you bake your cookies just right:
Step 1: Preheat Your Oven
Helpful hint: It usually takes about 10–15 minutes for an oven to preheat fully, so give it enough time. An oven thermometer helps ensure your oven is accurately heated to the correct temperature. Helpful hint: It usually takes about 10–15 minutes for an oven to preheat fully, so give it enough time. An oven thermometer is a handy way to verify that your oven is heating to the correct temperature.
Step 2: Space Your Cookies on the Baking Sheet
When placing your cookie dough on the baking sheet, give each dough ball enough space—about 2 inches apart. This allows the cookies to spread as they bake without running into each other, resulting in evenly baked cookies with the right amount of crispiness.Placing the dough too close together can lead to cookies merging and baking inconsistently.
Step 3: Keep an Eye on the Bake Time
Every oven is a little different, so it’s essential to monitor your cookies closely. Typically, Rumbl cookies need about 10 to 12 minutes in the oven to bake properly. However, start checking at the 8-minute mark—cookies can go from perfectly golden to overdone pretty quickly.
Step 4: Look for Visual Cues
Watch your cookies closely as they bake. You’ll know they’re ready when:
- The edges are slightly golden.
- The tops look set but soft.
- There’s a subtle crinkle on the surface.
For a softer, chewier texture, you may prefer to pull them out when the centers are still a bit soft. If you like a crisper edge, let them go a minute or two longer.
Step 5: Use the “Cookie Test” for Perfect Timing
If you’re unsure about when your cookies are done, perform the “cookie test.” Gently press on the edge of a cookie with a spoon or finger; if it feels set and doesn’t leave a dent, it’s ready to come out of the oven. To promote even baking, consider turning the baking sheet halfway through the bake time.
Step 6: Allow the Cookies to Cool Briefly Before Transferring
Once you take the cookies out of the oven, let them sit on the baking sheet for 2 to 3 minutes. This helps the cookies firm up slightly before you move them to a cooling rack. Don’t let them sit too long on the baking sheet, though—cookies will continue to bake from residual heat, and leaving them too long can cause over-baking.
Step 7: The Cooling Rack is Key
To achieve the best texture, move your cookies to a cooling rack so they can cool completely. This allows air to circulate around the cookies, preventing sogginess on the bottom. It also ensures the cookies set up perfectly and retain that desirable chewy texture.
Step 8: Perfect Your Timing with a Test Batch
If you’re baking a large batch or a new variation, consider testing with one or two cookies first. This will give you an idea of the perfect baking time and temperature for your specific oven and dough consistency.
Pro Tips for the Best Rumbl Cookies
Avoiding Common Mistakes
Baking Rumbl cookies may seem straightforward, but there are a few common mistakes that can throw off your results. By keeping an eye on these pitfalls, you can ensure your cookies come out just the way you want them—perfectly golden, soft, and chewy.
1. Not Measuring Ingredients Correctly
Accurate measurement is key to any successful cookie recipe. One of the most common mistakes is using incorrect measurements, especially for flour. Too much flour can lead to dense cookies, while too little can make them overly spread out. Always use the spoon-and-level method for measuring flour: spoon the flour into your measuring cup, then level it off with a flat edge.
Tip: A kitchen scale can help you achieve more consistent results, especially when measuring ingredients like flour and sugar.
2. Using Cold or Melted Butter
The butter’s temperature plays a key role in achieving the perfect texture. Cold butter won’t cream properly, while melted butter leads to a runny dough that spreads too much during baking. The perfect butter temperature is one that’s soft enough to leave an impression when pressed, but not so soft that it starts to melt.
Tip: If you forget to take your butter out in time, you can cut it into small cubes to speed up the softening process.
3. Overmixing the Dough
It’s tempting to mix the dough until it’s perfectly smooth, but overmixing can lead to tough cookies. Once the flour is incorporated and no longer visible, stop mixing. Overmixing the dough can activate the gluten, resulting in a denser, tougher texture.
Tip: If you’re adding mix-ins like chocolate chips or nuts, fold them in gently to avoid overworking the dough.
4. Baking at the Wrong Temperature
Baking at the wrong temperature can cause your cookies to spread too much or bake unevenly. Always preheat your oven to the correct temperature and use an oven thermometer to verify that it’s accurate. Some ovens have hot spots, so you might need to rotate your baking sheet halfway through baking to ensure even results.
Tip: For consistent baking, consider investing in a good-quality oven thermometer, especially if you notice that your cookies don’t always bake the same way.
5. Not Giving the Dough Time to Chill (When Necessary)
Chilling the dough before baking is a step that’s easy to overlook, but it’s essential for achieving the perfect cookie texture. Chilled dough is less likely to spread excessively, leading to thicker, chewier cookies. If your dough is too sticky, be sure to chill it—don’t skip this step!
Tip: If you’re in a rush, chill the dough in the fridge for 20 minutes to firm it up enough for easier handling.
6. Overcrowding the Baking Sheet
Another mistake is crowding the cookies too closely together on the baking sheet. This can cause the cookies to bake unevenly, and they might even spread into each other. Give each dough ball enough space—about 2 inches apart—so that they can spread properly without sticking together.
Tip: If you’re baking multiple batches, consider using two baking sheets to avoid overcrowding.
7. Underbaking or Overbaking
Getting the perfect bake time is crucial. Underbaking will result in doughy centers, while overbaking will lead to dry, crispy cookies. Keep a close eye on your cookies and remove them from the oven when the edges are golden and the centers are set but still soft.
Tip: Keep in mind that cookies keep cooking on the baking sheet even after they’ve been removed from the oven For softer cookies, pull them out just before they look completely baked—then allow them to cool right on the baking sheet.
8. Not Letting the Cookies Cool Properly
It’s tempting to dig into warm cookies straight from the oven, but if you don’t allow them to cool on the baking sheet for a few minutes, they may break break when moving them to a cooling rack. Let them set for 2-3 minutes so they can firm up before moving them.
Tip: After the initial cool-down on the baking sheet, transfer your cookies to a wire rack to finish cooling and avoid any sogginess from trapped heat.
Achieving Your Ideal Texture
The beauty of a Rumbl cookie lies not only in its flavor but in that perfect texture—whether it’s soft and gooey, thick and chewy, or golden and crisp around the edges. The texture you achieve depends on several key factors, from ingredient ratios to mixing techniques and even baking time.
1. Butter Consistency Matters
Your butter should be soft, not melted. Think of it like this: when you press it with your finger, it should yield gently without being oily or runny. This consistency helps incorporate air when creamed with sugar, contributing to a lighter, tender cookie. Too cold, and it won’t mix properly. Too warm, and your cookies could spread too much in the oven.
2. Sugar Ratios Make a Difference
The balance of white and brown sugar isn’t just about sweetness—it directly impacts texture. Brown sugar contains molasses, which attracts moisture and leads to a softer, chewier cookie. More white sugar, on the other hand, encourages spreading and a crispier finish. Adjust the ratio depending on your desired outcome.
3. Mix with Care
After incorporating the flour, mix just until the dough comes together to avoid overworking it. Stir just until everything comes together. Overmixing activates gluten in the flour, which can make the cookies dense and tough instead of tender and soft.
4. Don’t Skip the Chill
Refrigerating the dough helps firm up the fat, which in turn reduces how much the cookies spread while baking. This not only helps create a thicker cookie but also enhances flavor by giving the ingredients time to meld. A quick 30-minute chill can make a big difference, but if you have more time, chilling overnight yields even better results.
5. Bake Time and Temperature
For a soft, gooey center, take the cookies out of the oven as soon as the edges are lightly golden—the residual heat from the baking sheet will finish the job. Prefer a crispier bite? Extend the baking time by a minute or two for a crispier result. You can also try baking them at a slightly lower temperature for a bit longer to achieve a drier, crunchier texture.
6. Let Them Set Properly
Once baked, let the cookies cool on the tray for a couple of minutes before transferring them to a wire rack. This lets them firm up slightly so they don’t fall apart during the move, and allows the texture to stabilize as they cool.
Storing and Freezing Tips
Homemade Rumbl cookies are so delicious, they rarely last long—but if you’re lucky enough to have leftovers or want to plan ahead, proper storage and freezing can keep them fresh and flavorful for days (or even weeks). Here’s how to do it right:
1. Cool Completely Before Storing
Always let your cookies cool completely before placing them in a container. If they’re still warm, condensation can build up inside the container, making them soggy and ruining that perfect texture you worked so hard to achieve.
2. Choose the Right Container
Maintain your cookies’ soft and chewy texture by storing them in a sealed container at room temperature. For an extra boost of moisture, place a slice of bread inside—but keep it separated from the cookies. The bread absorbs air dryness, helping the cookies stay tender without becoming soggy.
If you prefer your cookies crisp, use a loosely covered container or a cookie tin that allows for a bit of air circulation.
3. How Long Do They Last?
Cookies usually remain fresh for 4 to 5 days when stored at room temperature. Freezing is a great way to extend their shelf life if you need to keep them fresh for more than a few days.
Freezing Cookies Like a Pro
4. Freezing Baked Cookies
After the cookies have cooled, spread them in a single layer on a baking sheet and freeze for 1 to 2 hours. When they’re firm, move them into an airtight container or freezer bag to keep them from clumping together. Don’t forget to mark the date—they’ll keep well in the freezer for up to three months.
When you’re ready to enjoy them, let the cookies thaw at room temperature or warm them in a low oven (about 300°F/150°C) for 5–7 minutes to bring back that just-baked flavor and texture.
5. Freezing Cookie Dough
Craving fresh cookies on demand? Try freezing the dough! Form the dough into small balls and arrange them on a parchment-lined baking tray Freeze the dough balls until they are fully set, then place them in a freezer-safe bag or container for long-term storage. When you’re ready to bake, pop them straight into the oven—just tack on an extra minute or two to the bake time.
This method is perfect for busy days, last-minute guests, or satisfying a late-night cookie craving without the mess of a full bake.
Proper storage doesn’t just preserve freshness—it also helps you enjoy your homemade Rumbl cookies whenever the craving strikes. Whether you’re saving leftovers or prepping ahead, these tips will keep every bite tasting bakery-fresh.
Creative Variations to Try
Gluten-Free Rumbl Cookies
Making gluten-free Rumbl cookies is a great way to ensure everyone can enjoy these delicious treats without sacrificing flavor or texture. Whether you’re baking for someone with gluten sensitivities or just want to try a different take on the classic, the key to success lies in selecting the right gluten-free ingredients and making a few simple adjustments.
Choosing the Right Gluten-Free Flour
The most important step when making gluten-free cookies is choosing a good gluten-free flour blend. Not all gluten-free flours are created equal, and using the wrong one can affect the texture and taste of your cookies. Look for a high-quality, all-purpose gluten-free flour blend that’s designed to mimic traditional wheat flour. These blends typically include a mix of rice flour, potato starch, and tapioca flour, which provide the necessary structure and chewiness for your cookies.
If you’re feeling adventurous, you can also try experimenting with individual gluten-free flours like almond flour, coconut flour, or oat flour. Keep in mind that you may need to adjust the liquid ratios slightly, as these flours behave differently from traditional wheat flour. For example, almond flour adds moisture, while coconut flour absorbs more liquid and might require extra egg or fat.
Adding Binders
Since gluten-free flours lack the elasticity and structure that gluten provides, it’s essential to incorporate a binder to hold the dough together. Common binders used in gluten-free baking include xanthan gum, guar gum, or psyllium husk. These ingredients help give your cookies that chewy, soft texture that you expect from traditional Rumbl cookies. If your gluten-free flour mix includes a binder, additional binding agents may not be necessary. But if you’re using a single flour like almond or coconut flour, adding a small amount of xanthan gum (usually around 1/4 teaspoon per cup of flour) can help improve the texture.
Adjusting Wet Ingredients
When making gluten-free Rumbl cookies, you may need to slightly adjust the amount of wet ingredients. Gluten-free flours can behave differently than traditional flours, so it’s important to make sure the dough is not too dry or too wet. Adding an extra egg can help improve the structure and moisture content, as eggs are natural binders in baking. Additionally, using a bit more butter or oil can help create a rich, chewy cookie texture.
If you’re looking to make these cookies dairy-free as well, you can substitute the butter with a dairy-free margarine or coconut oil. Just make sure to keep the fat content high to maintain that soft, chewy texture.
Flavor Enhancements for Gluten-Free Cookies
Just because you’re baking gluten-free doesn’t mean you have to compromise on flavor. Many gluten-free flours, especially almond or oat flour, lend a naturally nutty or wholesome flavor to your cookies. You can also add extra ingredients to enhance the taste, such as vanilla extract, a pinch of cinnamon, or even a splash of maple syrup for added sweetness.
Baking Tips for Gluten-Free Cookies
- Chill the dough: Just like regular cookies, gluten-free Rumbl cookies benefit from chilling the dough before baking. This helps prevent the cookies from spreading too much during baking and ensures they keep their shape.
- Baking time: Gluten-free cookies may bake a little quicker than their traditional counterparts, so keep an eye on them in the oven. Start checking for doneness around the 8-minute mark, as gluten-free cookies can go from perfectly baked to overdone quickly.
By following these tips and making slight adjustments, you can create gluten-free Rumbl cookies that are just as delicious and satisfying as the original. Enjoy the same soft, chewy, and indulgent texture while keeping your treat gluten-free!
Vegan-Friendly Version
Creating a vegan-friendly version of Rumbl cookies ensures that those following a plant-based diet can still enjoy these delicious treats. By making a few simple ingredient swaps, you can achieve the same chewy, flavorful cookies without using any animal products. Here’s how to make your Rumbl cookies completely vegan:
Substituting the Eggs
Eggs are a key ingredient in traditional cookie recipes, providing structure, moisture, and helping to bind the dough. However, in vegan baking, you can easily replace eggs with plant-based alternatives. Here are a few options:
- Flaxseed meal or chia seeds: Mix 1 tablespoon of ground flaxseed or chia seeds with 3 tablespoons of water. Let it sit for 5 minutes until it becomes a gel-like consistency. This mixture acts as a binder, much like eggs.
- Applesauce: Use 1/4 cup of unsweetened applesauce to replace one egg. Applesauce serves as a binding agent in the dough while contributing a mild sweetness and added moisture.
- Silken tofu: Replace one egg with 1/4 cup of blended silken tofu. Its subtle flavor makes it a great choice for adding structure and moisture to the dough without overpowering other ingredients.
- Commercial egg replacers: There are several commercial egg replacers available that are designed specifically for baking. ChatGPT said:
- Check the packaging for specific ratio guidelines to ensure accurate measurements.
Select the egg substitute that aligns with your desired texture and flavor. Flaxseed and chia tend to impart a mild nutty flavor, while options like applesauce and tofu provide a more neutral taste.
Replacing Butter with Plant-Based Fats
Butter provides rich flavor and moisture in traditional Rumbl cookies, but it’s easy to replace it with plant-based alternatives. Here are some options:
- Vegan butter: Vegan butter is an excellent one-to-one substitute for regular butter. It’s made from plant oils like coconut, avocado, or olive oil and provides the same creamy texture and flavor.
- Coconut oil makes an excellent substitute for butter. It offers a subtle coconut flavor, so it pairs well with cookies that have tropical ingredients (like coconut or pineapple). ChatGPT said:
- Use it as a one-to-one replacement for the amount of butter listed in the recipe.
- Nut butters: For added flavor and richness, you can swap in almond butter, peanut butter, or cashew butter. Nut butters will change the flavor profile slightly, adding a nutty undertone while keeping the dough soft and chewy.
Choosing Dairy-Free Milk
Traditional Rumbl cookie recipes might call for milk, which adds moisture to the dough. To make your cookies vegan, simply swap the dairy milk with any plant-based milk, such as:
- Almond milk: A mild, versatile option that won’t overpower the cookie flavor.
- Oat milk: Known for its creamy texture and subtle sweetness, oat milk works wonderfully in baking.
- Coconut milk: Coconut milk adds a bit of tropical flair and moisture, but it can alter the flavor slightly, so it’s perfect for recipes that incorporate coconut or tropical flavors.
Use the same amount of plant-based milk as you would dairy milk in the original recipe.
Replacing Sugar
Some sugars are processed with bone char, which is not vegan-friendly. To ensure your Rumbl cookies are completely plant-based, opt for vegan-friendly sugar varieties. Look for sugar labeled as “organic” or “unrefined,” as these are typically free from bone char.
Alternatively, you can use natural sweeteners like:
- Maple syrup: It adds a rich, caramel-like sweetness with a touch of depth. When using maple syrup as a substitute, decrease the liquid in the recipe a bit to balance the extra moisture it adds.
- Coconut sugar: This unrefined sugar has a mild caramel flavor and is less processed than white sugar, making it a good choice for vegan baking.
- Agave nectar: A liquid sweetener that’s milder in flavor than maple syrup, agave works well in baking and dissolves easily in dough.
Flavor Enhancements and Add-ins
To keep your vegan-friendly Rumbl cookies just as delicious, you can add flavor-enhancing ingredients:
- Vanilla extract: Pure vanilla extract is naturally vegan and adds depth and warmth to the cookies.
- Cinnamon or nutmeg: These spices bring an extra layer of flavor, especially in the colder months when comforting, spiced treats are favored.
- Vegan chocolate chips: Make sure to choose chocolate chips that are labeled as dairy-free. There are plenty of vegan chocolate options available, from dark chocolate chips to dairy-free milk chocolate.
Baking Tips for Vegan Cookies
- Check the texture: Vegan dough may behave a bit differently than regular dough. If it feels too dry, add a bit more liquid (such as plant-based milk) or fat (like coconut oil or vegan butter). If the dough appears too sticky, incorporate a small amount of flour to adjust the texture.
- Chill the dough: Just like traditional cookie dough, vegan dough benefits from being chilled before baking. This helps prevent spreading and gives the cookies a chewy texture.
Vegan Cookie Success
By replacing eggs, butter, milk, and using vegan-friendly sugars, you can create the perfect vegan Rumbl cookie that everyone can enjoy, whether they’re plant-based eaters or not. Vegan cookies are just as indulgent and delightful as their non-vegan counterparts, so don’t be afraid to dive in and try this plant-based version.
Holiday-Themed Twists
Rumbl cookies are incredibly versatile, which makes them perfect for customizing to match the theme of any holiday or special occasion. With just a few simple ingredient changes and creative touches, you can turn your basic Rumbl cookies into festive treats that are perfect for celebrating. Here are some ideas for holiday-themed twists that will make your cookies stand out:
Christmas Cheer
For the holidays, adding a bit of festive flair to your Rumbl cookies can really elevate them. Here are some ways to turn your cookies into Christmas treats:
- Peppermint: Add crushed candy canes or a few drops of peppermint extract to the dough to infuse your cookies with that iconic holiday flavor. The refreshing hint of mint complements both dark and white chocolate chips wonderfully.
- Red and Green Sprinkles: Decorate your cookies with red and green sprinkles before baking for a simple yet festive touch. The vibrant colors make your cookies pop and give them an extra cheerful look.
- Cinnamon and Nutmeg: These warm spices are essential for Christmas baking. Adding a teaspoon of cinnamon or nutmeg to your cookie dough gives them a cozy, spiced flavor that’s perfect for the season.
- White Chocolate and Cranberries: If you prefer a holiday twist that’s a bit more sophisticated, try adding white chocolate chips and dried cranberries to your cookie dough. This combination brings a touch of sweetness and tartness that’s perfect for Christmas.
Thanksgiving Delights
Thanksgiving cookies can embrace the flavors of the season, reflecting the hearty and warm spices that are so beloved during the holiday:
- Pumpkin Spice: Add a tablespoon of pumpkin puree and a teaspoon of pumpkin pie spice to your cookie dough for a soft, cakey texture and a subtle autumn flavor. You can also fold in some chopped pecans or walnuts for a crunchy contrast.
- Apple Cinnamon: Incorporating small chunks of fresh apples and a pinch of cinnamon can give your cookies a comforting fall flavor. For extra sweetness, you can drizzle a bit of maple syrup over the cooled cookies.
- Maple Pecan: Try adding maple syrup and toasted pecans to your dough. This pairing captures the cozy spirit of Thanksgiving—earthy pecans meet the warm sweetness of maple syrup for a perfectly balanced flavor.
- Sweet Potato: If you’re feeling adventurous, use mashed sweet potato in place of part of the butter to give your cookies a unique twist. This results in a tender, moist consistency with a subtle sweetness and a hint of earthy depth.
Halloween Fun
Halloween cookies are all about creating a spooky and fun atmosphere. Here are some playful ways to make your Rumbl cookies stand out for Halloween:
- Orange and Black Sprinkles: Add festive orange and black sprinkles to the dough before baking, or sprinkle them on top right after they come out of the oven. This simple decoration makes your cookies look instantly Halloween-ready.
- Candy Corn: You can fold in candy corn pieces or use them to decorate your cookies. Their bright yellow, orange, and white colors add a playful and eye-catching touch.
- Chocolate and Marshmallows: For a treat that resembles a Halloween classic, incorporate mini marshmallows and chocolate chunks into the dough. The gooey marshmallows create a fun texture, while the chocolate chips add a rich, decadent flavor.
- Monster Eyes: Decorate your cookies with candy eyes to make them look like little monsters. Simply press the eyes into the cookies once they’ve been baked and cooled, adding a spooky effect.
Valentine’s Day Love
For Valentine’s Day, transform your Rumbl cookies into sweet, romantic treats that your loved ones will adore:
- Heart-Shaped Cookies: Use a heart-shaped cookie cutter to create love-themed cookies. You can also decorate them with a drizzle of pink or red icing for a fun and sweet touch.
- Strawberry or Raspberry Jam: Create a jam-filled surprise in the center of your cookies by pressing a little spoonful of strawberry or raspberry jam into the center before baking. The bright, fruity notes provide a lovely balance to the richness of the cookie base, creating a more dynamic flavor in every bite.
- Chocolate-Covered Strawberry Twist: Mix in crushed freeze-dried strawberries for bursts of berry flavor, then finish each cookie with a drizzle of melted dark or white chocolate. It’s an elegant, love-inspired treat perfect for special occasions.
- Red Velvet Twist: For a deeper color and rich flavor, try adding a tablespoon of cocoa powder and a few drops of red food coloring to your dough. The outcome is a stunning red cookie with a subtle chocolate undertone.
Easter Celebration
Easter cookies are a great opportunity to embrace vibrant colors and fresh, seasonal flavors :
- Try a combination of lemon zest and dried lavender in your dough to create a soft, fragrant cookie that feels just right for spring.
- The zesty lemon flavor combined with the delicate floral hints of lavender makes these cookies a perfect choice for Easter celebrations and springtime gatherings.
New Year’s Eve Party Treats
Celebrate the New Year with cookies that shimmer and dazzle—perfect for ringing in the festivities with a touch of flair :
- Edible Glitter: Add edible glitter to your cookies right before baking to give them a sparkling, festive finish.
- Champagne Flavor: For an elegant touch, use champagne or sparkling wine to replace the milk in your recipe. This adds a subtle effervescent flavor and makes the cookies feel extra special.
- Gold Leaf: Top your cookies with a few pieces of edible gold leaf to create a glamorous, luxurious treat perfect for ringing in the new year.
Customizing for Any Holiday
The key to holiday-themed cookies is to be creative and match the flavors, colors, and decorations to the season. You can always personalize your Rumbl cookies by incorporating ingredients that reflect your unique holiday preferences—whether it’s a favorite spice, a particular fruit, or just some fun decoration ideas!
FAQs About Rumbl Cookies
Can I Use Oil Instead of Butter?
Yes, you can definitely substitute oil for butter in cookie recipes, but it’s important to understand how this change affects both the texture and flavor of the cookies.
Texture Differences
Butter contributes to cookies’ flavor and texture by providing both fat and water, which helps with the spread and tenderness. When you use oil, you’re replacing the water content with pure fat, which often results in cookies that are a bit more tender but might spread more. Depending on the type of oil you use, the cookies may have a softer, slightly more crumbly texture compared to those made with butter. If you’re looking for a firmer texture, you might need to adjust the recipe by adding a little more flour.
Types of Oil to Use
The type of oil you choose can also influence the flavor of your cookies. Vegetable oil or canola oil is the most neutral in flavor and works well in almost any cookie recipe without altering the taste. For a slightly richer flavor, you could opt for oils like coconut oil, which also adds a slight coconut flavor, or olive oil for a more savory or Mediterranean twist.
Measurement Adjustments
When substituting oil for butter, a general rule of thumb is to use about 3/4 of the amount of oil as the recipe calls for butter. For example, if the recipe calls for 1 cup of butter, use about 3/4 cup of oil. However, this may vary depending on the recipe and the desired consistency of the dough. You may need to adjust the amount of liquid or dry ingredients slightly to account for the differences between oil and butter.
Other Considerations
Keep in mind that oil doesn’t have the same ability to cream with sugar as butter does. This means your dough might not have the same light, airy consistency that butter provides. If you want to mimic the creaming process, you could beat the oil with the sugar for a few minutes, but it won’t provide the same structure as creamed butter.
In summary, while oil can be used in place of butter, it will change the texture and flavor of your cookies. By experimenting with different oils and adjusting your measurements, you can find the right balance to achieve the results you’re looking for.
How Do I Keep Cookies Soft?
Nothing beats biting into a cookie that’s perfectly soft and chewy. If you’re aiming for that tender, bakery-style texture, a few simple tips can make all the difference:
1. Don’t Overbake
Achieving soft cookies begins with how they’re baked. Take them out while the centers still look slightly underdone—they’ll continue to cook from the residual heat once out of the oven. This helps avoid that dry, crumbly texture that comes from overbaking.
2. Store Properly
Once your cookies have completely cooled, keep them in an airtight container at room temperature. Air exposure dries them out quickly. To keep them even softer for longer, toss a slice of bread into the container. The cookies will absorb just enough moisture from the bread to stay soft, but be sure the bread doesn’t touch the cookies directly.
3. Use the Right Sugars
Brown sugar is your best friend for soft cookies—it contains more moisture than white sugar thanks to the molasses. Incorporating brown sugar, either fully or partially with white sugar, adds moisture and chewiness to the cookies due to its molasses content.
4. Add an Extra Egg Yolk
If your recipe allows, adding one extra egg yolk can increase the richness and moisture in the dough. The fat in the yolk helps keep the texture tender and chewy.
5. Chill the Dough
Chilling the cookie dough before baking not only improves flavor but also helps control spread. Cookies that don’t spread too much in the oven tend to have a thicker, softer texture.
6. Avoid Over mixing
After adding the dry ingredients, stir only until the mixture is fully incorporated to avoid over mixing. Overworking the dough can lead to tough, dense cookies due to the development of too much gluten.
7. Use Cornstarch or Pudding Mix
Some bakers swear by adding a teaspoon or two of cornstarch or a spoonful of instant pudding mix to the dough. These ingredients can help create a softer, more tender bite.
By combining these methods, you’ll have a much better shot at baking cookies that stay soft and irresistible—even days after baking!
Can I Double the Recipe?
Yes, you can definitely double most cookie recipes—but there are a few things to keep in mind to ensure your results are just as delicious as a single batch. Doubling a recipe isn’t always as simple as multiplying every ingredient by two, especially when it comes to baking.
Measure Carefully: Accuracy is crucial when baking. Use a digital kitchen scale if possible to ensure precise measurements, particularly with flour, leavening agents (like baking soda or baking powder), and sugar. Small miscalculations can have a bigger impact when the quantities are increased.
Mixing Matters: Larger batches of dough can be harder to mix evenly. To prevent overworking the dough or missing pockets of unmixed ingredients, combine everything in stages. You might mix the wet and dry ingredients separately in two batches, then bring them together.
Baking in Batches: Even though you’ve doubled the dough, avoid overcrowding your baking sheets. Bake your cookies in smaller batches to ensure even heat distribution. Placing too many trays in the oven at once or reusing a hot baking sheet can cause uneven spreading and affect their texture.
Refrigerate the dough: If the dough feels too soft or sticky after mixing, give it a chill in the fridge to firm it up.
Watch the Bake Time: While the individual cookies will bake for the same amount of time, make sure your oven temperature remains consistent, especially if you’re baking multiple trays in a row. An oven thermometer can be a helpful tool in this situation.
Storing Extra Dough or Cookies: Doubling the recipe is also great if you want to freeze some dough or baked cookies for later. Simply adhere to the correct freezing and storage procedures to keep them fresh.
Conclusion
This Rumbl Cookie recipe is a must-try because it delivers the perfect balance of texture and flavor, creating a batch of cookies that are soft, chewy, and absolutely irresistible. With easy-to-follow instructions and a few handy tips, you’ll have cookies that are not only delicious but also a joy to make. Whether you stick with the classic version or experiment with fun variations, these cookies will quickly become a favorite in your baking repertoire.
Now it’s your turn to try them out! We’d love to hear how your Rumbl Cookies turn out. Leave a comment below to share your experience, or let us know what twist you added to the recipe. Don’t forget to share the recipe with your friends, and spread the cookie love! Happy baking!